


madPete
-
Posts
1,670 -
Joined
-
Last visited
Content Type
Profiles
Forums
Events
Gallery
Posts posted by madPete
-
-
And we owe him thanks big time... powder has gone way up, i think its closer to $30-35 a can now
-
Chris made some cartridge rolls as well! Much safer loading on the field this way.
-
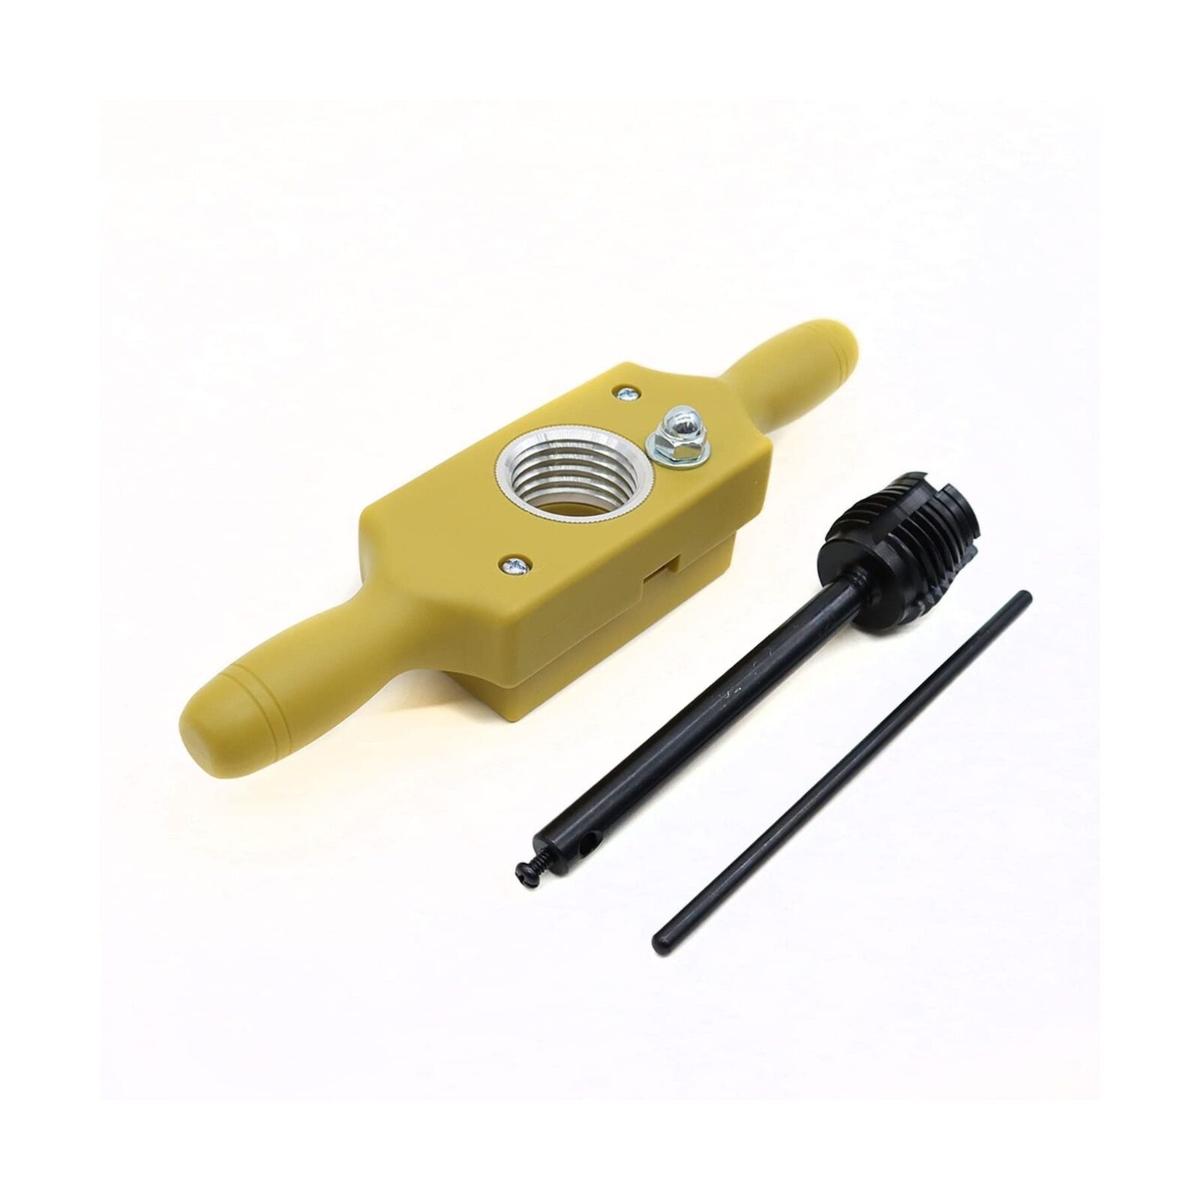
Wow. I have so much sweat equity and experimentation time in this I almost dont want to share it, so I'm abbreviating it here...
You need the kit in the picture. They are $40-$70 depending where you get it. Mine was around $40 on Ebay. I bought the 1-1/8 inch tap kit.
When tapping the hole use a liberal amount of tung oil or some equal kind of lubricant.
Soak the ends of the dowels in tung oil for 10 minutes before threading those. Go slow and smooth.

-
It's half-pint sized too!
-
$20 a can.
He has 3 cans of 3F and 1 of reenactor grade (mixed 2F/3f). He needs one can for himself so we can get up to 3 cans if needed...
-
LOL and I never made them before! There's enough parts to make 1 more, but another one wont fit in the box for the implements. Maybe I can assemble it there if I take the ends off and fit it in one of the duffels.
I'm not sure how to get them back unless we stop at the post office which might be tight on Monday morning before the flight.
Maybe we could auction 1 off in the dead man's auction and then dis-assemble the other two for duffel bag If I'm not over the weight limit.
-
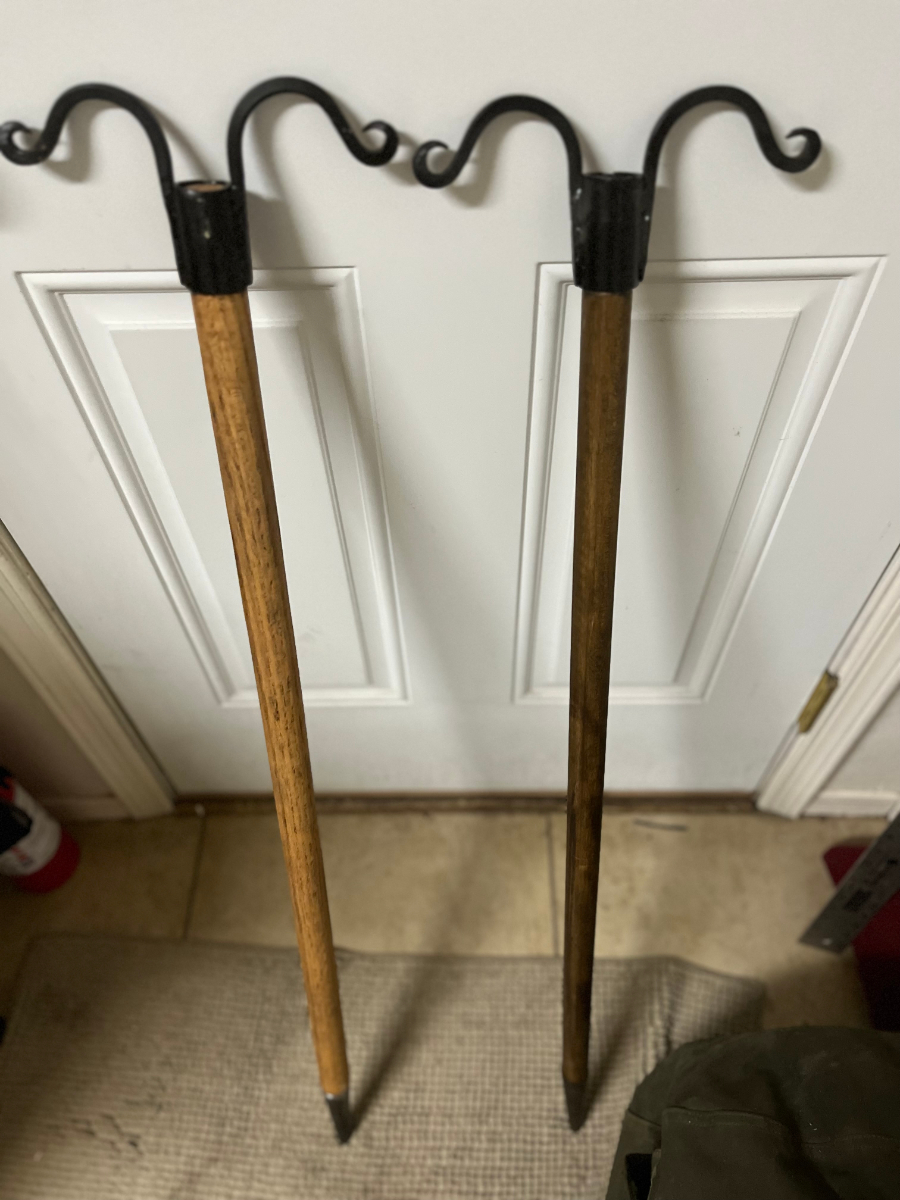
Wow. I thought I posted another pic of the 2nd completed one last week. I dont see it here tho. Maybe I put it in the wrong thread...
I was searching for a specific size Oak dowel, which I never found, so I got one a bit larger and whittled it down for the Metal ends.
We have two completed. I was going to ship these to Chris along with the Cannon implements for Brien's friend. Was just waiting til we were a bit closer to the date to ship them...

-
I believe it was $20-25 for a can. I'll have to check with him I dont recall
-
TBD - More to Follow...
-
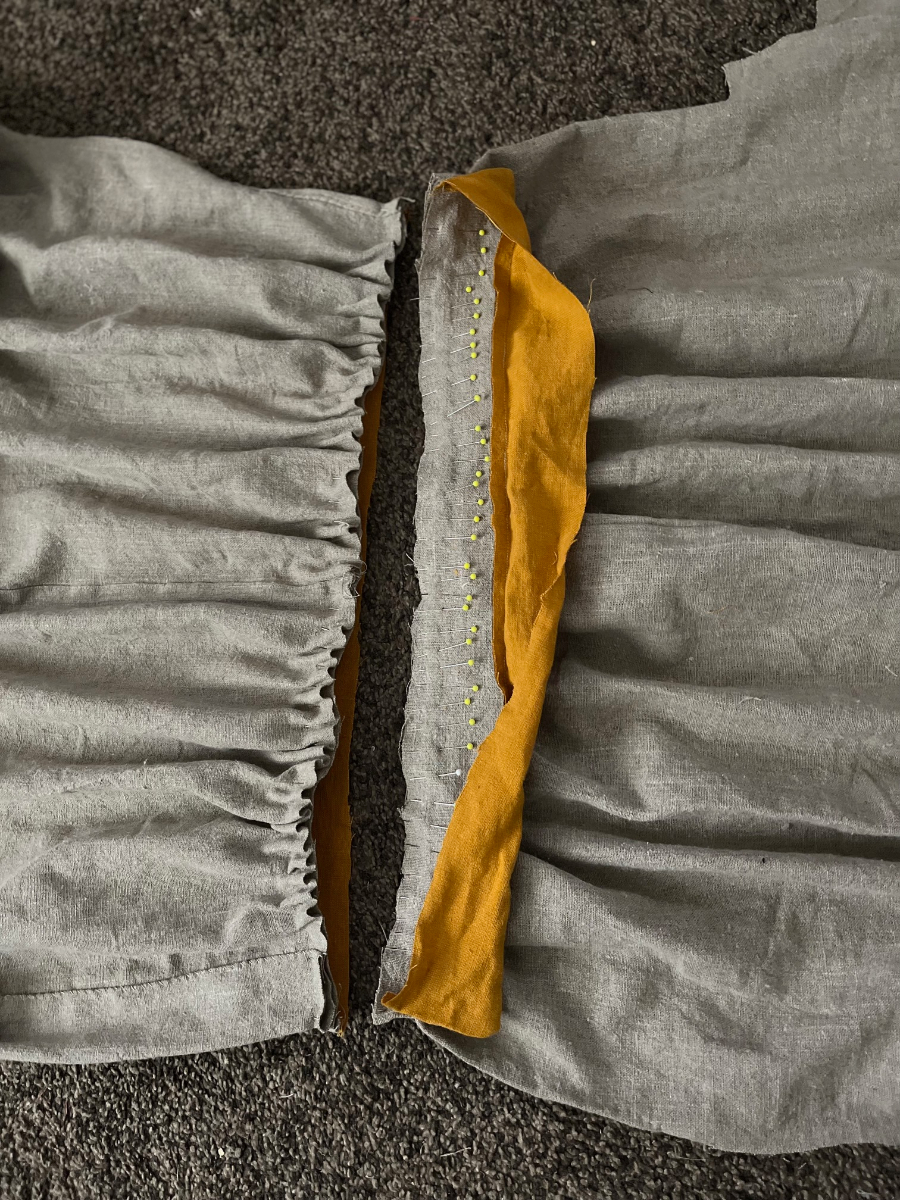
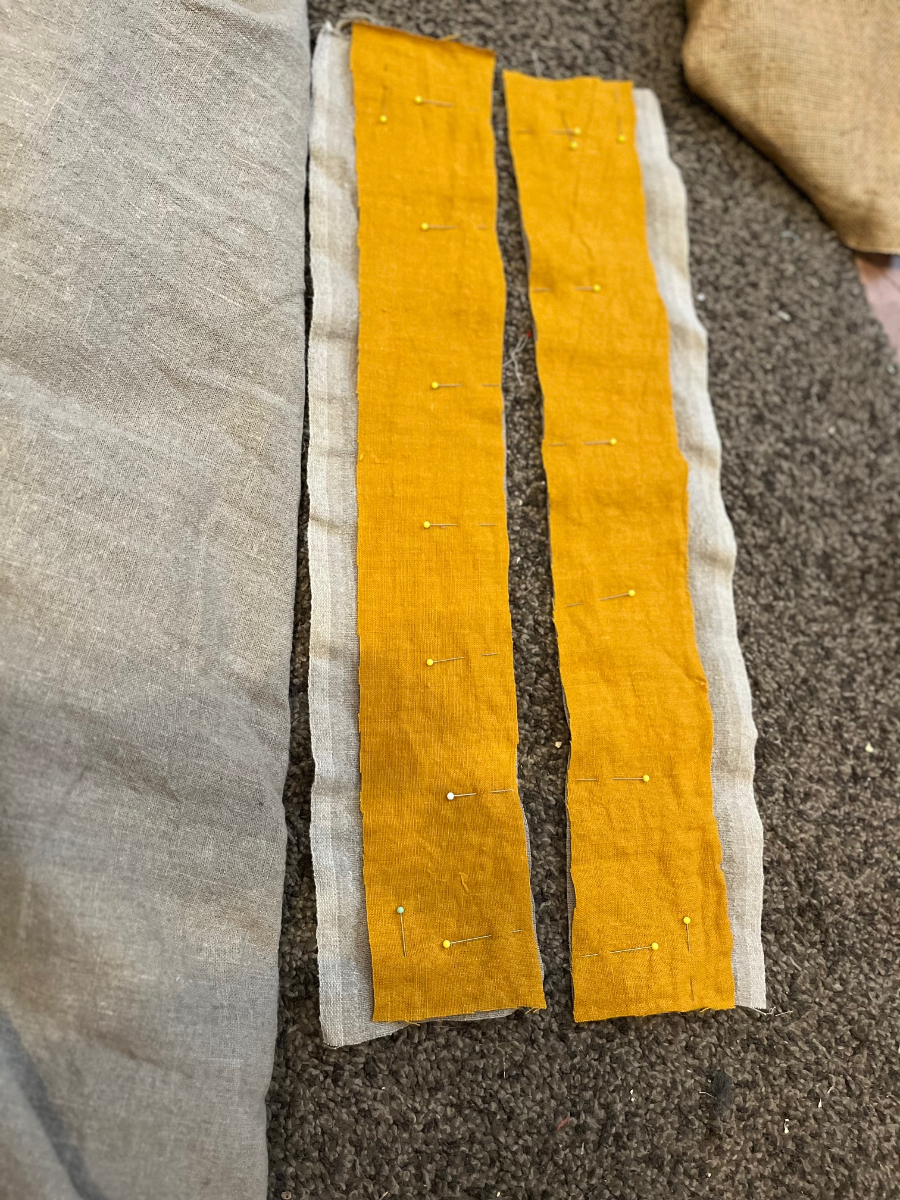
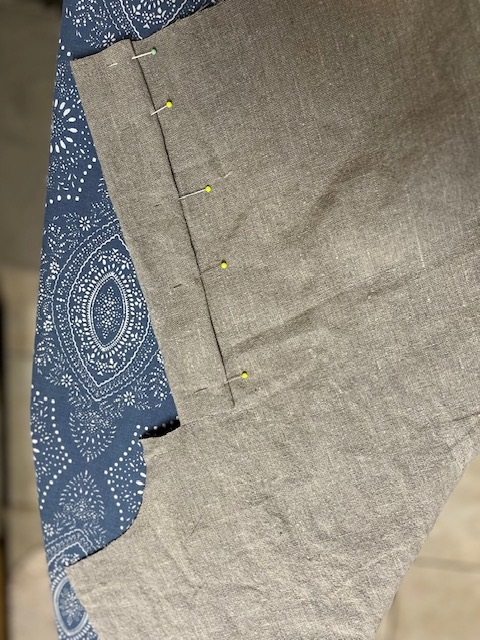
Lay each side of the body flat on the floor or table. right-side of fabric up.
Pin the ends and the center of the waistband to the body. Material right-side to right-side. On the fly and back opening pin the waistband flat for about an inch from each end.
If you do gathers the traditional way, now is the time. I dont do gathers the traditional way, so what follows is just my method..
I then split the difference on the extra material and pin again in the center of waistband that is still loose.. basicaly splitting the difference each time. Then I proceed to bunch the fabric every 1/4 to 1/2 inch and pin. This is the way I do gathers.
Once you have this pinned, you can hand stitch or machine stitch (1/4 to 3/8 inch from the edge). Up to you, because this ends up hidden inside the waistband.
Note: I flipped one side over after I pinned both.
-
Next is handstitching, although you can do this with a machine. Its one of the few parts that may be visible at times.
Before you stitch make sure you've pinned them on the proper side of the body, so that you have two halves mirror image of each other.
Hand stitch the inside of the fly on the right and left main body
Hand stitch the back opening on the right and left main body.
-
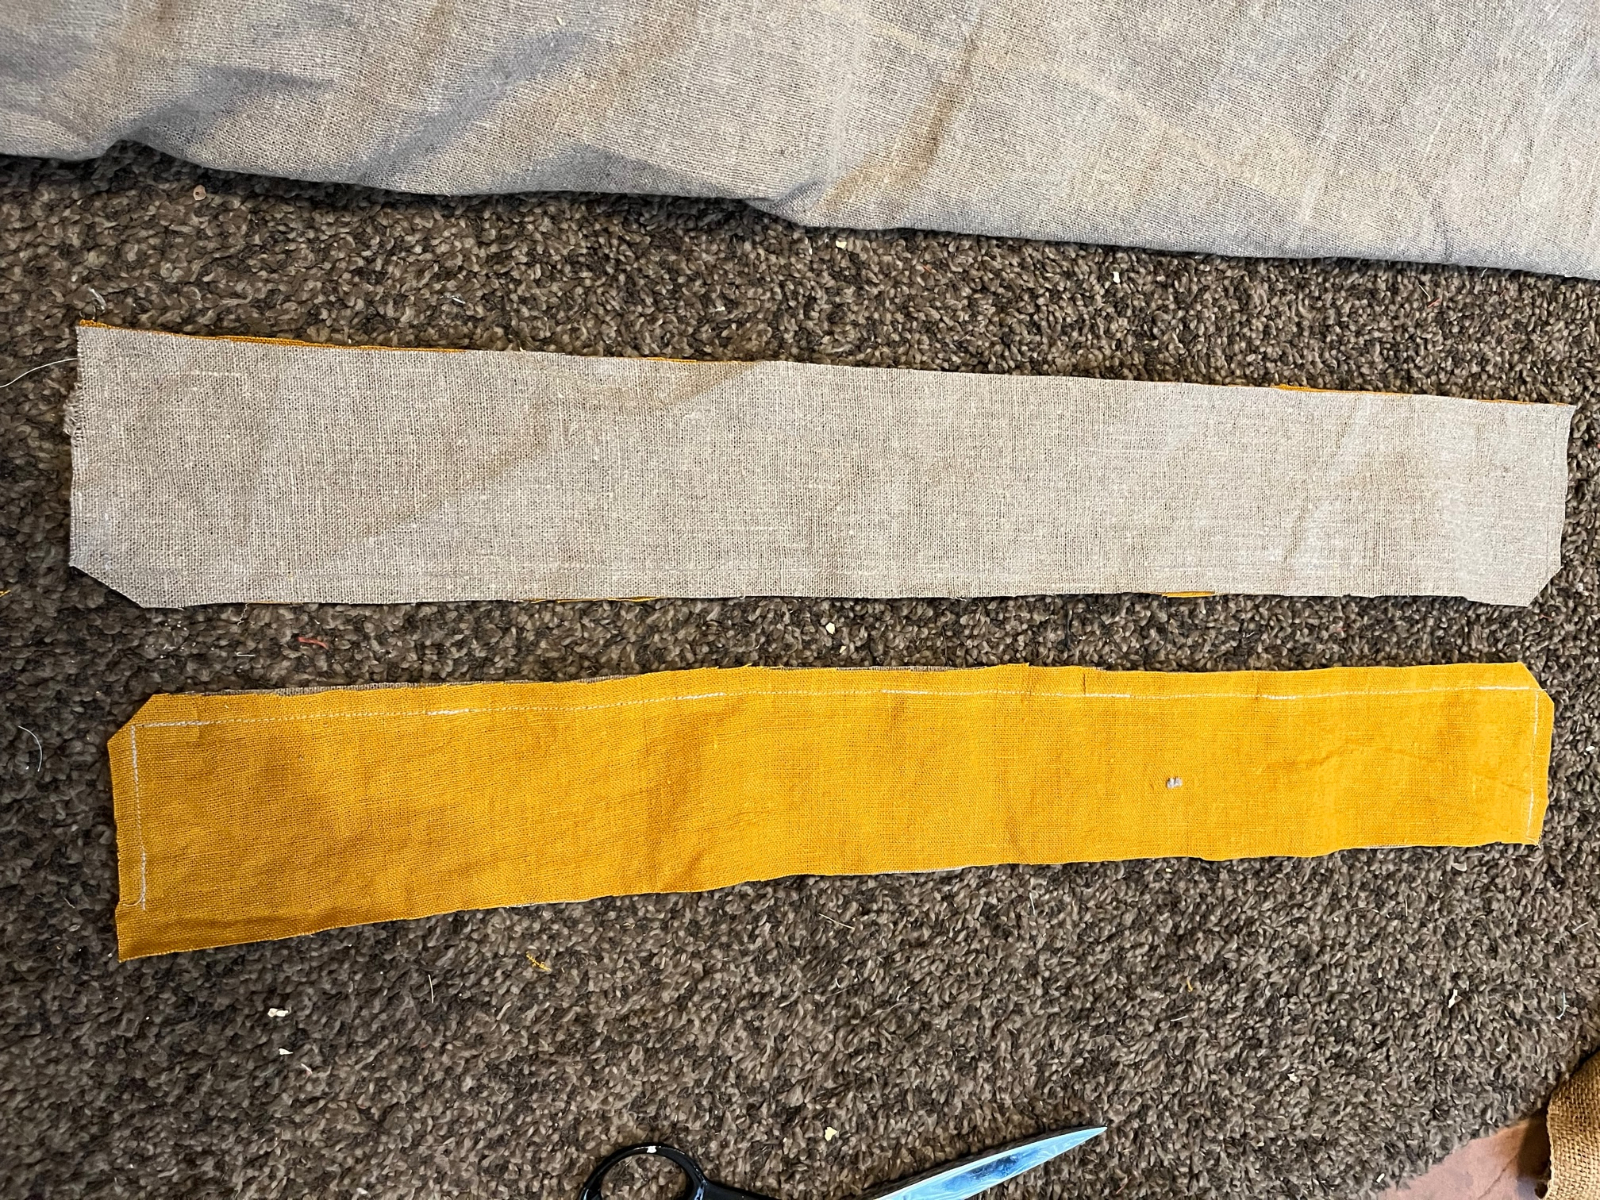
Turn the waistband right-side out and flatten. spray with a spray bottle and iron the waistband flat. I didnt have a spray bottle so I got a little crazy splashing water on the waistbands. trim any excess from the hems so its fairly even. you can shorten the height of the waistband at this point if you wish. I try to keep them about 1 to 1-1/2 inches wide plus the hem width.
-
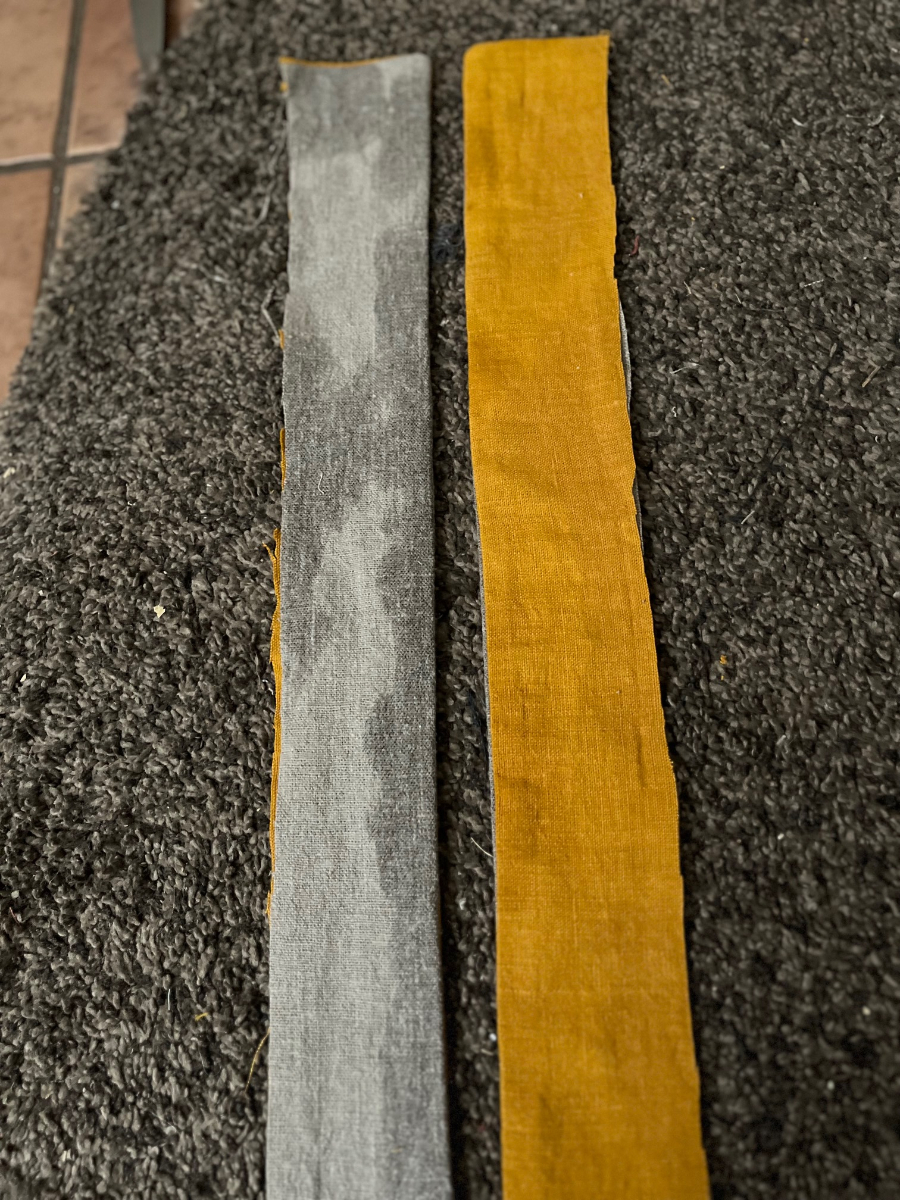
Cut two waistbands approx 2 1/2 inches wide, and 1 inch longer than half your total waist size. This allows a half inch hem and each end of the waistband. Cut a second set for the inside of the waistband. I always use a softer linen on the inside, sometimes the heavy linen is a bit scratchy. Often I'll used striped linen as a lining for the waistband. pin them together right-side to right-side (if there is one, most linen is the same either side)
The waist bands are then exactly half the total waist size. 1 for each half of the main body of the slops., right side and left side. When you put a button hole in the front left of the waistband, the waistband will overlap and inch or so. This opens a slight gap in back where the tie will go and leaves a small amount of adjustment with the ties in back.
Stitch starting at one end. I backstitch at the ends and every 3-4 inches over the entire length. Then if a thread breaks it only unravels to the point of the backstitch and is easily repaired. Not that this is a problem, but slops are made for heavy work, so...
Stitch the length of the waistband on one side only. Stitch both ends. Trim the corners, so when it is turned right-side out, the corners are not bunched together.
-
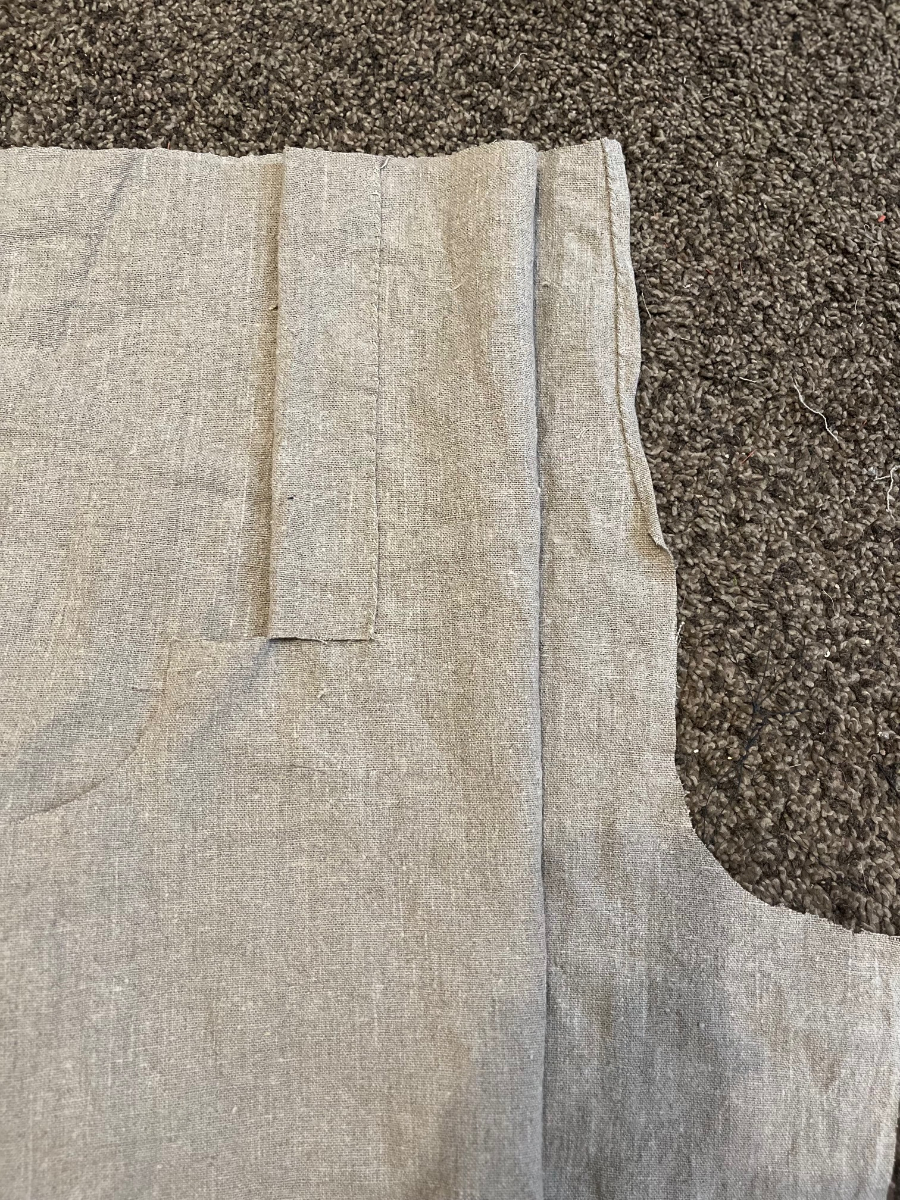
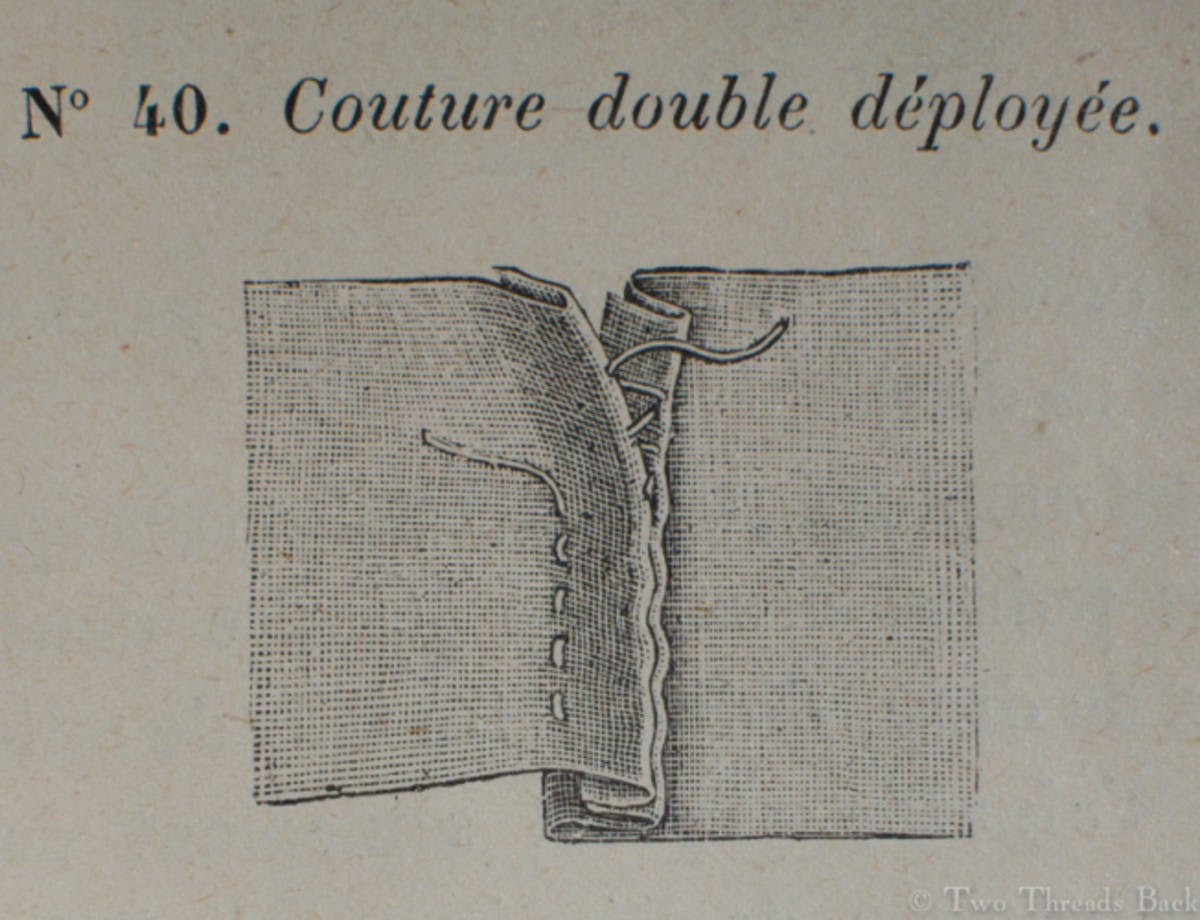
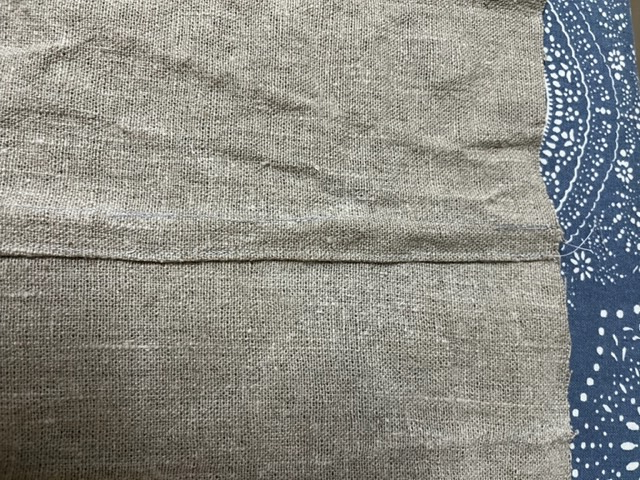
Now left side front and left side back get stitched together at the side seam. Same with right side front and right back. I machine stitched this portion. stitch sides together right side to right side. fold hems over on the inside (wrong side). Lay down on the fabric and stitch through the edge of the hem and the main body. Optionally you can stitch just the edge of the hem. French seam diagram for clarity...
-
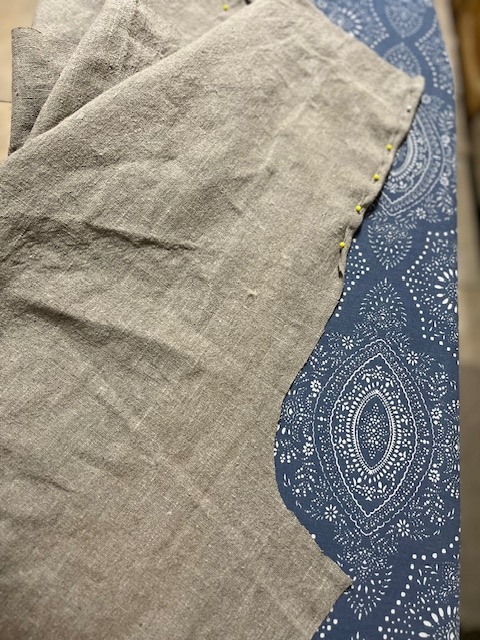
Here are the main sections pinned and ready to hand stitch fly and back opening. make sure to do opposites on right and left sides (i.e. a mirror image)!!
-
Since I'm in the process of making a pair of slops, I started taking pics. figured might be a good tutorial.
First - I'm going to mention washing and drying your fabric on high heat. This will eliminate 95% of any shrinkage in the fabric. You certainly dont want them to shrink after being stitched together and taking your careful measurements into consideration
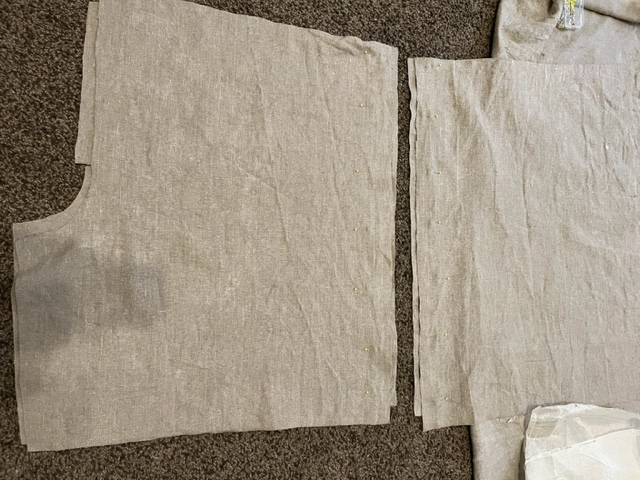
Here are the main sections of fabric cut for the slops. two fronts and two backs. Left front and left back will be stitched together at the side seam. As will the right front and right back.
-
2 hours ago, Stynky Tudor said:
These are fantastic, Great job!
Thanks!
-
I will have something for the auction, probably hand made. Just not sure what exactly... yet.
-
Welcome aboard! Yo Ho!
-
2 hours ago, TudorSmith said:
I have an entire giant roll of the fabric if you want any! No idea the official contents but I'd say full cotton, maybe a cotton heavy cotton-linen blend. Definitely natural fibers based off burn test. Obvi, full linen would be better, but this was a lovely steal at the low price of "free" lol.
The cuffs are just shy of 2 inches, so a bit past that outside margin. I think they were supposed to be closer to that inch and a half but I tend to cut wider for extra seam allowance but then never use it. I will definitely adjust that if I make it to a third shift!
Looks great! Your French seam in particular is so clean I could swoon. I'm only on my second attempt ever on French seams so they are still not quite as trim and smooth. But one more technique I plan on perfecting as I go lol. If nothing else this whole absurdly ambitious project has definitely taught me a few things.
Bring a sample of your fabric to Ft Gaines. I'm supposed to demonstrate clothing and bring fabric samples anyway. If its something I can use or even suggest a good use for it could be worthwhile. I can't use more fabric til after Ft Gaines anyway. My hands are full right now.
Seam is not as clean as it appears. It is machine sewn, but it blends in on that heavy fabric. I dont normally do french seams, but it was easier than my regular method, and probably stronger, at least for the side seams. I keep trying new things now that I'm not so burned out on stitching. Trying new things keeps it fresh.
-
Honestly dont know anythign about french cuffs, but I like that material, makes for a nice shirt!
-
William took a lot of pics and posted most of them on facebook. We did some staged ones on the beach burying treasure, marooned etc... I'll ask If I can post them here on the pub.
-
3 hours ago, madPete said:
working on a couple pair of slops now...
These are a heavier material (10oz linen) than I've used before.
Here is the side seam (french seam) and the preparation for handstitching the fly and the back slit
-
When I make sleeves, I always use the last 3 or 4 inches of seam as the open part of the cuff and roll the edges of the slit. Then the point of the underarm gusset goes in the other end of the seam and that way the seam is always underside of the sleeve.


Pot Luck Saturday Night at Ft Gaines
in Massacre Island
Posted
got it and added to the list!