madPete Posted May 23, 2023 Share Posted May 23, 2023 I found a similar one. In the process of stretching it to a larger size. I removed the inside lining, soaked it in water and put a couple of hat stretchers inside to open it up. Next will be shaping it and spraying with combination of shellac flakes and denatured alcohol to keep its shape Aye... Plunder Awaits! Link to comment Share on other sites More sharing options...
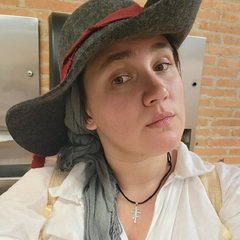
Stynky Tudor Posted May 23, 2023 Share Posted May 23, 2023 On 5/21/2023 at 7:05 PM, TudorSmith said: But for now, here's my latest thrift find.... It's supposedly "boho" but screamed "100% wool hat blank"ish for $10 plus shipping. It's a bit snug, so i will need to steam and stretch it. That's a great looking hat blank! If' it's a bit snug, you might want to get yourself a simple "hat stretcher". They usually run about $15 or $20 on ebay & amazon. Link to comment Share on other sites More sharing options...
Stynky Tudor Posted May 23, 2023 Share Posted May 23, 2023 3 hours ago, madPete said: Next will be shaping it and spraying with combination of shellac flakes and denatured alcohol to keep its shape Let us know how well that works for you - maybe you can share the process. Decades ago I gave it a try, it didn't really seem to soak in/penetrate the hat fibers very well. Instead it just created a hard candy shell to it, without firming up it's shape. Link to comment Share on other sites More sharing options...
madPete Posted May 24, 2023 Share Posted May 24, 2023 I've done it before, its worked great every time. Here's where I got the information: https://www.youtube.com/watch?v=DHma3dpYqRw basically I bought a can of denatured alcohol at homedepot, dumped the shellac flakes into the can (measured per the video). Then you have to let the denatured alcohol break down the shellac for a couples days. Shake it up, transfer to a spray bottle and good to go. You can spray several times depending how stiff you need it. it takes a while to evaporate and dry, so I use rubber bands or whatever I can scrounge to keep its shape while it dries. You have to make sure the wool soaks in the mixture. If it just sits on the surface, you have some other coating on yer hat that needs to be removed! Aye... Plunder Awaits! Link to comment Share on other sites More sharing options...
madPete Posted May 24, 2023 Share Posted May 24, 2023 The hat is for Glo, I already have one I did in a similar fashion. It had to be stretched cause she has a large head (like me), and removed the liner. I'll put a linen lining in it once we have the shape done. We'll put a braided somethign or other around the outside. But we all need something to keep the sun off our faces... The shellac flakes are a couple years old and tend to bunch up, so I had to mash them with a hammer to get them small enough to go in the can. Aye... Plunder Awaits! Link to comment Share on other sites More sharing options...
Tudor MercWench Smith Posted May 24, 2023 Author Share Posted May 24, 2023 10 hours ago, madPete said: I found a similar one. In the process of stretching it to a larger size. I removed the inside lining, soaked it in water and put a couple of hat stretchers inside to open it up. Next will be shaping it and spraying with combination of shellac flakes and denatured alcohol to keep its shape I plan to do similar with stretching, eventually. However It's going to be an 11th hour project, cause if i don't get to it, it's still functional in that as long as I'm careful about how i put back my hair it will still fit on my head and keep the sun off my face, whereas other projects are more necessities. Mine is pretty soft so I'm not sure it would keep it's shape even with shellac, and i have to say i don't mind the soft, floppy-ish aesthetic. Just don't know if it's particularly period. 7 hours ago, Stynky Tudor said: That's a great looking hat blank! If' it's a bit snug, you might want to get yourself a simple "hat stretcher". They usually run about $15 or $20 on ebay & amazon. That would probably work much more functionally then my kids' soccer ball. This is all provided my oldest mutineer doesn't steel it from me Link to comment Share on other sites More sharing options...
Tudor MercWench Smith Posted May 24, 2023 Author Share Posted May 24, 2023 In other news ....three days worth of progress on the proto type for my "slops" I'm actually going with the "early period trousers" cut on the RH706 Breeches and Slops pattern. More in period then the slops, and better look for me then the breeches. I'm not necessarily going full Read/Bonney woodcuts for my overall aesthetic but definitely drawing inspo from them, and they are both in more a trouser style then the later period slops or the fitted at the knee breeches, so that informed my choice slightly Both the warning in the pattern itself and the few scant reviews i found of it had me fearing they would be harder to go together and fit but so far they have gone together pretty intuitively and well, but it's still mid process on the prototype so still plenty of time for it to get scuppered. So far only deviation or alterations I'm considering is maybe a gusset but that is an easy-ish addition Currently hand stitching. I was planning on machine doing the prototype at least, but that requires me to be in a different room working and I'd rather sit on the couch and hand stitch while i watch TV with the fam. It also gives my typically sloppy hand stitch some practice. Who knows if the final versions will be hand finished or not. Prototype cut out of an old cotton duvet cover. If the go together well enough they might even be a good functional back up pair. Pics of the current state of the project (phone ate days 1 and 2 photos): Link to comment Share on other sites More sharing options...
madPete Posted May 24, 2023 Share Posted May 24, 2023 This shellac mixture will make the floppiest hat hold its shape. It may take several applications, but I'm sold on this stuff. You can always mix it stiffer than the recipe calls for too. fyi, I think we got the exact same hat! Aye... Plunder Awaits! Link to comment Share on other sites More sharing options...
madPete Posted May 24, 2023 Share Posted May 24, 2023 2 minutes ago, TudorSmith said: In other news ....three days worth of progress on the proto type for my "slops" I'm actually going with the "early period trousers" cut on the RH706 Breeches and Slops pattern. More in period then the slops, and better look for me then the breeches. I'm not necessarily going full Read/Bonney woodcuts for my overall aesthetic but definitely drawing inspo from them, and they are both in more a trouser style then the later period slops or the fitted at the knee breeches, so that informed my choice slightly Both the warning in the pattern itself and the few scant reviews i found of it had me fearing they would be harder to go together and fit but so far they have gone together pretty intuitively and well, but it's still mid process on the prototype so still plenty of time for it to get scuppered. So far only deviation or alterations I'm considering is maybe a gusset but that is an easy-ish addition Currently hand stitching. I was planning on machine doing the prototype at least, but that requires me to be in a different room working and I'd rather sit on the couch and hand stitch while i watch TV with the fam. It also gives my typically sloppy hand stitch some practice. Who knows if the final versions will be hand finished or not. Prototype cut out of an old cotton duvet cover. If the go together well enough they might even be a good functional back up pair. Pics of the current state of the project (phone ate days 1 and 2 photos): It seems that I recall someone saying that the seat was cut a bit tight based on the RH pattern. But that was many years ago, like 10 years! I started with the pattern from Kanniks Korner and used it without issue. Later I narrowed the waistband and used gathers instead of pleats to make them more authentic looking Aye... Plunder Awaits! Link to comment Share on other sites More sharing options...
Tudor MercWench Smith Posted May 24, 2023 Author Share Posted May 24, 2023 11 minutes ago, madPete said: It seems that I recall someone saying that the seat was cut a bit tight based on the RH pattern. But that was many years ago, like 10 years! I started with the pattern from Kanniks Korner and used it without issue. Later I narrowed the waistband and used gathers instead of pleats to make them more authentic looking I can see that. I actually cut about a size and a half bigger then my measurements called for so that might have resolved some of that issue. If i do decide on the gusset that might resolve some of that too. We shall see. I'm still just working on assembling so i haven't done too much with fit yet. Link to comment Share on other sites More sharing options...
michaelsbagley Posted May 24, 2023 Share Posted May 24, 2023 (edited) The RH breeches pattern has a lot of variables.... and can be quite workable, if you are patient and ask the correct people the right questions. First peice of advice, never even mention them on "historical costuming" discussion forums or boards. All you will get is a tidal wave of negativity. That said, the "Late period" breeches pattern from that set, I have never gotten to work correctly. I got close before giving up, and if I tried again, I probably could "get it". This was the variant that was the most problematic on the fit of the seat. Another 'problem' with this variant, is they fit VERY "low-rise", like they fit lower on the hip than most people are used-to/comfortable-with. Like lower than even modern low-rise jeans. The "early period" breeches, I managed to get to work going up one size on the waistband, and 2 sizes on the leg portions (I have pretty muscular upper legs, so a thinner persion might get away with only going up a single size). These are my personal favourite from this pattern package. madPete's suggestion of the Kannicks Korner pattern is alright.... those work. However, if memory serves, those are drop-fly breeches, and not appropro for GAoP (unless they have a French Fly pattern I am unaware of). And even then, knowing Kannicks are very much mid-to-late 18th c. and 19th c. pattern company, my guess is, that even if they have a "French Fly" breeches pattern, they will look and fit like later period breeches (snugger in fit and more tapered) than GAoP should. If you use the RH pattern, you will find the instruction to make a mock-up out of garbage/cheap fabric first.... the best path to success is to NOT SKIP that step, which most of the haterz do..... and then wonder why the RH patterns get so much hate. Edited May 24, 2023 by michaelsbagley Link to comment Share on other sites More sharing options...
madPete Posted May 24, 2023 Share Posted May 24, 2023 I was talking slops not breeches on the Kanniks corner. they are french fly Aye... Plunder Awaits! Link to comment Share on other sites More sharing options...
michaelsbagley Posted May 24, 2023 Share Posted May 24, 2023 Teach me to not read further back in the conversation. But yeah, I've never tried the Kannick's slops.... but I've used enough of their other stuff to trust them. They make good patterns. Link to comment Share on other sites More sharing options...
Tudor MercWench Smith Posted May 24, 2023 Author Share Posted May 24, 2023 (edited) 2 hours ago, michaelsbagley said: The RH breeches pattern has a lot of variables.... and can be quite workable, if you are patient and ask the correct people the right questions. First peice of advice, never even mention them on "historical costuming" discussion forums or boards. All you will get is a tidal wave of negativity. That said, the "Late period" breeches pattern from that set, I have never gotten to work correctly. I got close before giving up, and if I tried again, I probably could "get it". This was the variant that was the most problematic on the fit of the seat. Another 'problem' with this variant, is they fit VERY "low-rise", like they fit lower on the hip than most people are used-to/comfortable-with. Like lower than even modern low-rise jeans. The "early period" breeches, I managed to get to work going up one size on the waistband, and 2 sizes on the leg portions (I have pretty muscular upper legs, so a thinner persion might get away with only going up a single size). These are my personal favourite from this pattern package. madPete's suggestion of the Kannicks Korner pattern is alright.... those work. However, if memory serves, those are drop-fly breeches, and not appropro for GAoP (unless they have a French Fly pattern I am unaware of). And even then, knowing Kannicks are very much mid-to-late 18th c. and 19th c. pattern company, my guess is, that even if they have a "French Fly" breeches pattern, they will look and fit like later period breeches (snugger in fit and more tapered) than GAoP should. If you use the RH pattern, you will find the instruction to make a mock-up out of garbage/cheap fabric first.... the best path to success is to NOT SKIP that step, which most of the haterz do..... and then wonder why the RH patterns get so much hate. Lol...i learned never to mention RH patterns in forums two years ago when i was working on a German Renaissance outfit. Some of the critiques were valid but not applicable to me ("the pattern assumes you have some knowledge of XYZ"....well, i do so no big deal). In the end, the only problems i had with the final finish were that i am lacking in skills and patience for tailoring/fitted garments. Yes, a more commercial pattern might dumb that part down for me more. But ultimately, that's still a ME issue, not a problem with the pattern. Good notes on the late period breeches....though as someone who was a young woman in the aughties, super low rise would probably just feel like a return to my youth lol. I am a big advocate of the mock ups, as suggested in the patterns, just cause my parsimony over my "good" fabric far outweighs my hastiness and lack of attention to details. They are all affectionately referred to as my "macaroni prototypes". I'm pretty pleased with how this one is going but will have to take a look at the Kannicks patterns to, even though i try to not buy too many patterns any more lol Edited May 24, 2023 by TudorSmith Link to comment Share on other sites More sharing options...
Stynky Tudor Posted May 24, 2023 Share Posted May 24, 2023 17 hours ago, madPete said: I've done it before, its worked great every time. Here's where I got the information: https://www.youtube.com/watch?v=DHma3dpYqRw Your shellac flakes look totally different from what I used. I don't recall where (online) I purchased mine from - again it was ages ago when I was actually making/felting my own hat blanks...or trying to anyway. But I remember using denatured alcohol and the shellac was in powder form that I believe I purchased it from a millianary source. Anyway the one hat I tried it on didn't come out well and ended up being used for a kid's Halloween costume. Thanks for sharing your process as well as the tube link! Link to comment Share on other sites More sharing options...
madPete Posted May 26, 2023 Share Posted May 26, 2023 I think the mix was like 2-3 tablespoons to the can. this way the alcohol soaks into the wool, dries and leaves the shellac in the wool. Maybe you were mixed too thick and it couldnt penetrate? Aye... Plunder Awaits! Link to comment Share on other sites More sharing options...
Stynky Tudor Posted May 26, 2023 Share Posted May 26, 2023 45 minutes ago, madPete said: Maybe you were mixed too thick. . . Maybe, I definitely did something wrong - I'll have to give it another try. Link to comment Share on other sites More sharing options...
Tudor MercWench Smith Posted June 3, 2023 Author Share Posted June 3, 2023 Soooo.... macaroni prototype is done with moderately successful results. Factoring in the slightly substandard fabric used for the test run, the fact that i was playing a bit fast and loose with my handstitching, and that i forgot to put in the button fly....they look pretty decent. I mean, not particularly flattering....but fit and style looks "right". No serious fit issues, could probably get by with no gusset, seat is loose and comfy, though front might be a touch too baggy because of it. Waistband was a bit skronky but that's mostly due to me having to recut it last minute. Will probably go back in and put the fly in to practice button holes, in between cutting and assembling the main body of my good fabric pair. cutting good fabric tonight while my linen for my shirts gets it prewash treatment. behold my mountain of shirt weight white linen! Link to comment Share on other sites More sharing options...
Mary Diamond Posted June 3, 2023 Share Posted June 3, 2023 Looking good! I would note that I have only ever seen gathers, not pleats, to the waistband… Reference link: https://collections.vam.ac.uk/item/O13921/coat-and-breeches-unknown/?carousel-image=2020MT0492 Oooh, shiny! Link to comment Share on other sites More sharing options...
Tudor MercWench Smith Posted June 3, 2023 Author Share Posted June 3, 2023 1 hour ago, Mary Diamond said: Looking good! I would note that I have only ever seen gathers, not pleats, to the waistband… Reference link: https://collections.vam.ac.uk/item/O13921/coat-and-breeches-unknown/?carousel-image=2020MT0492 Noted! Excellent reference link too thanks! The pleats were more laziness on my part. I did gathers on one section but wanted to get it done and the cotton i was using was being a pain to gather. Hopefully the linen will be less fussy. I got it all cut and main body assembled last night so it's fly and waistband tonight so we shall see how it goes. Link to comment Share on other sites More sharing options...
Tudor MercWench Smith Posted June 11, 2023 Author Share Posted June 11, 2023 First pair of slops functionally finished!! I could have shopped around better for buttons but liked these wooden ones from JoAnns well enough so i picked them up with a coupon. Learned a new technique for gathering into the waistband and was pretty pleased with the results. Fit is good, they are delightful comfortable (could live in them) and i think the overall look is good. After I finish the eyelets in the back waistband and cleaning up some raw interior edges it will be on to shirts next. Overall though, i found the pattern way easier then i had prepared for. As previously discussed, maybe the style i picked (trousers over breeches) made it less fussy to fit. In other news....i think i am going to pull the trigger and just purchase a set of stays. I keep looking at the pattern and dreading it so that's never a good thing. I've been eyeing up the ones on offer from Samson historical....a bit out of period but not by much, still similar shape and style, and without having to lay out for a custom order. I just have to decide what style to pick next. Onwards onto the next project i guess... Link to comment Share on other sites More sharing options...
Stynky Tudor Posted June 11, 2023 Share Posted June 11, 2023 Noice work! Link to comment Share on other sites More sharing options...
madPete Posted June 11, 2023 Share Posted June 11, 2023 9 hours ago, TudorSmith said: You might want to extend the opening slightly lower, so they dont tear out. with your shirt tucked in there are no vanity issues... Aye... Plunder Awaits! Link to comment Share on other sites More sharing options...
Tudor MercWench Smith Posted June 11, 2023 Author Share Posted June 11, 2023 3 hours ago, madPete said: You might want to extend the opening slightly lower, so they dont tear out. with your shirt tucked in there are no vanity issues... Oh good tip! Wasn't sure how far it should open so erred on the side of high cause it's easier to open them then it is to reclose them. Will have to go back in and do this once i get the other stuff done Link to comment Share on other sites More sharing options...
madPete Posted June 12, 2023 Share Posted June 12, 2023 some breeches come with a flap inside to cover the opening when its fully stretched. dont know how authentic that is, but better than having issues. Aye... Plunder Awaits! Link to comment Share on other sites More sharing options...

Recommended Posts
Create an account or sign in to comment
You need to be a member in order to leave a comment
Create an account
Sign up for a new account in our community. It's easy!
Register a new accountSign in
Already have an account? Sign in here.
Sign In Now