

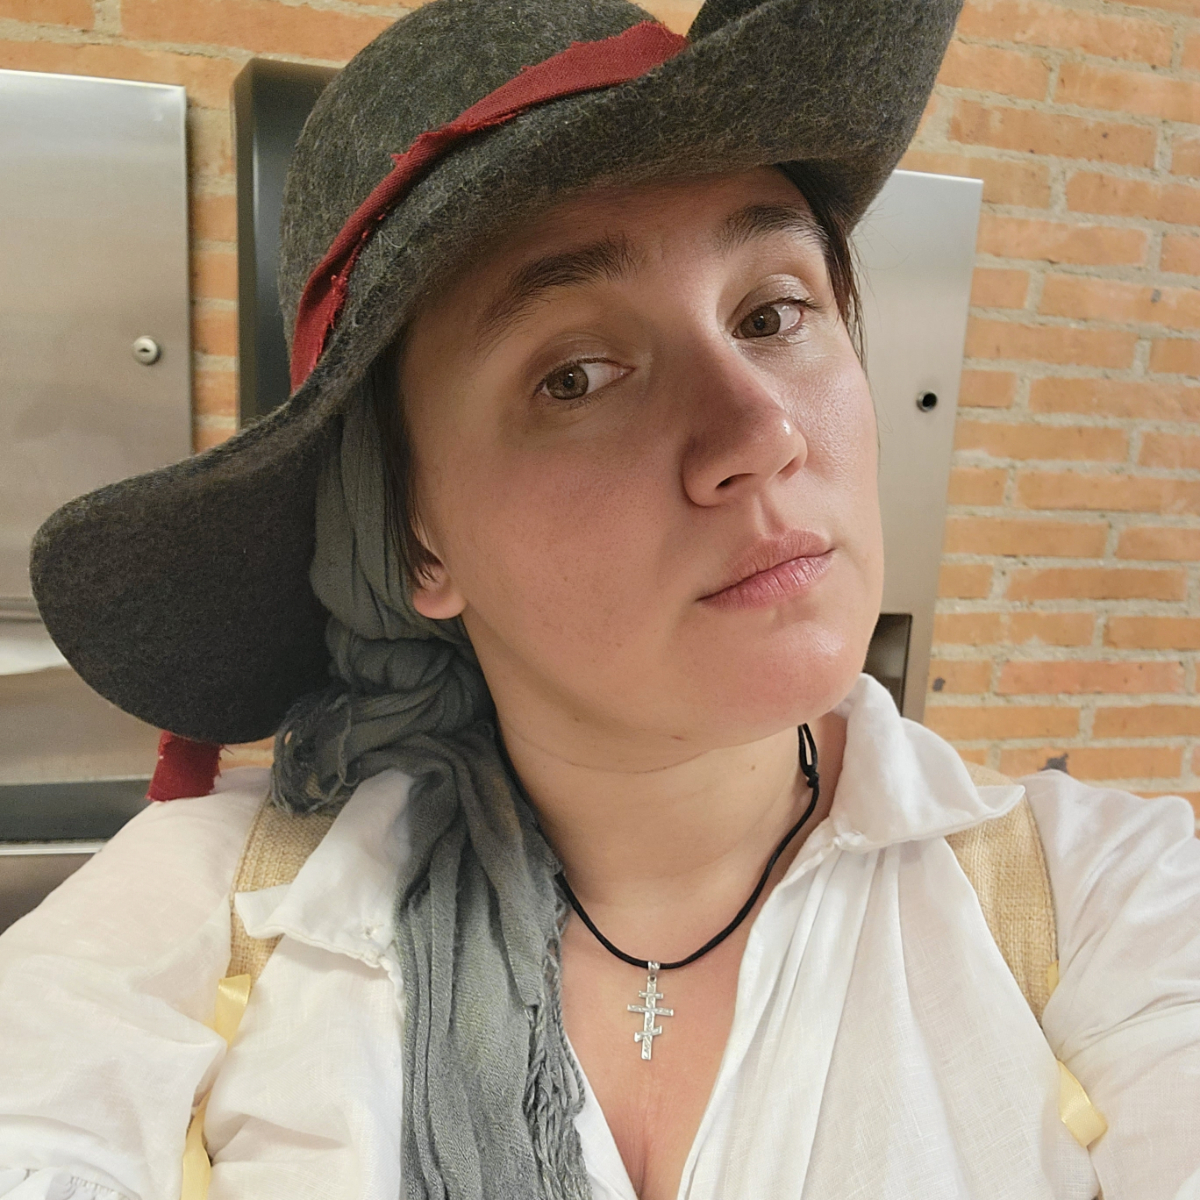
Tudor MercWench Smith
-
Posts
168 -
Joined
-
Last visited
Content Type
Profiles
Forums
Events
Gallery
Posts posted by Tudor MercWench Smith
-
-
Buttonholing is the woooooooooooorst....

Upside of so many buttonholes.....lost of practice has them finally looking decent ish from all the practice.
Downside of so many buttonholes..... You think you are making progress only to realize you are only half way through just the front....
-
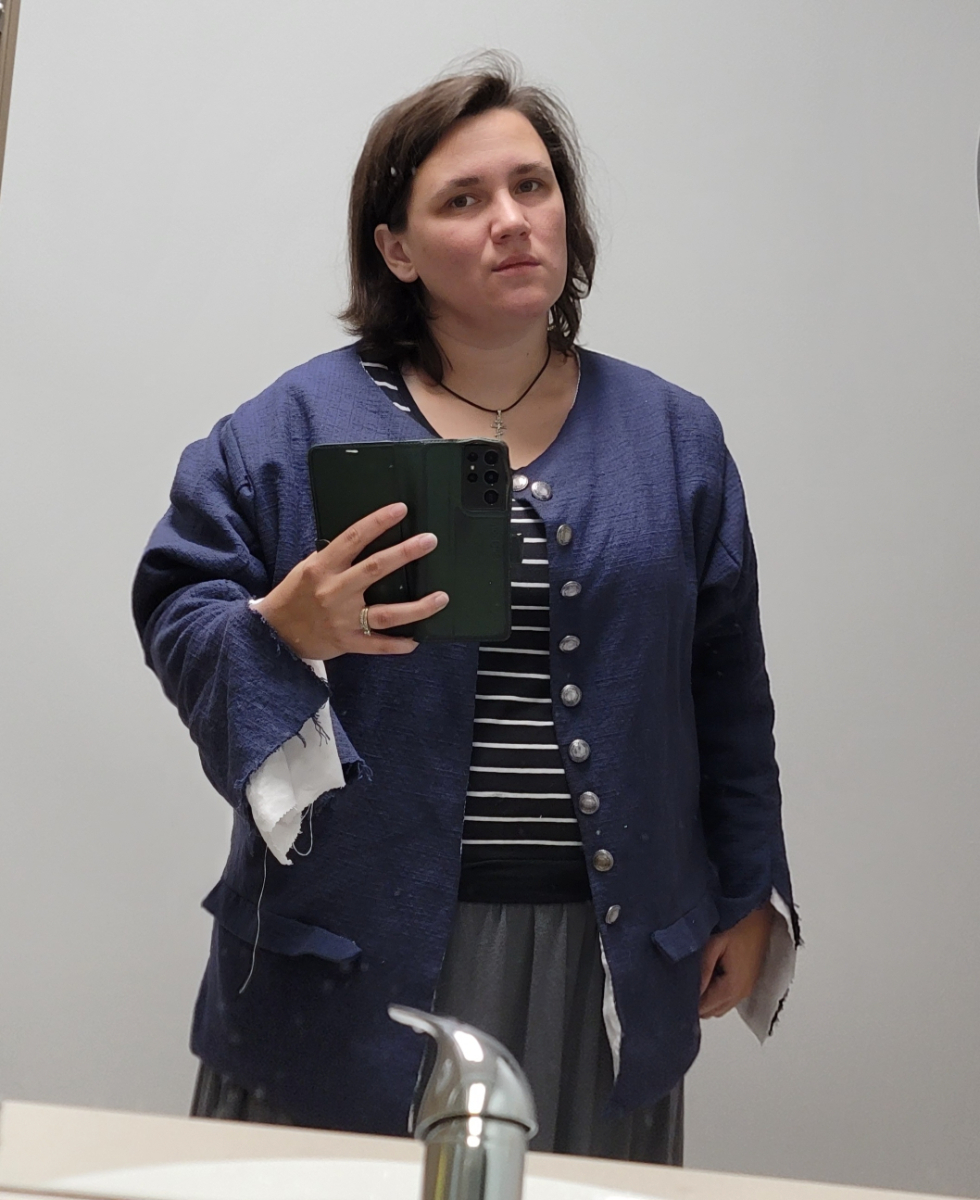
AirCon at work is excessively glacial, so since my coat project gets carried with me wherever I go in case I get a minute to work on it, it's getting a trial wear early.
Shoulders and chest are cut to accommodate the stays, not modern gear, hence the current bagginess ...and cuffing the sleeves and starting button holes are today's projects but otherwise....I'm faintly pleased with myself
-
54 minutes ago, Stynky Tudor said:
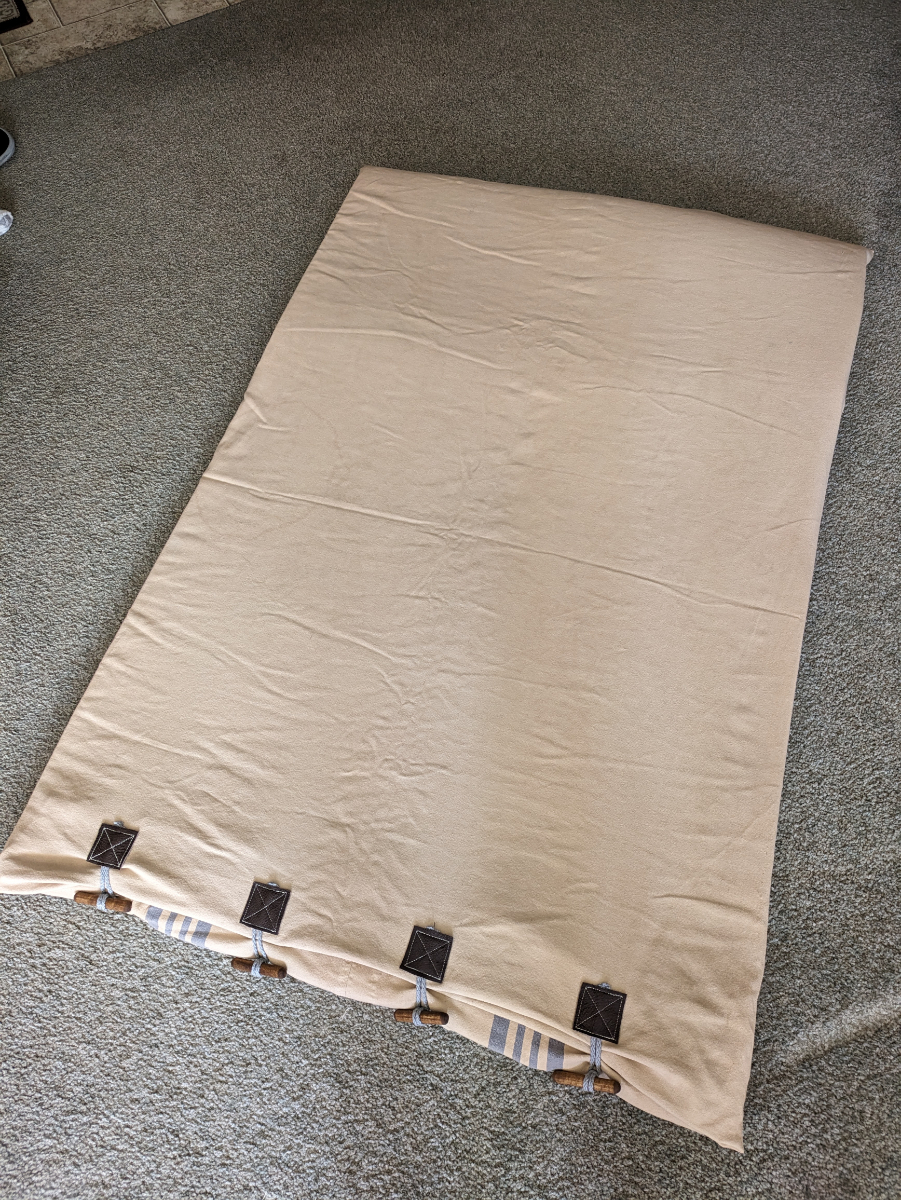
I don't have a cot as yet, but it's on the list. I kinda finished my short mattress bag - had to remove the partial seams at the bottom. I added a squareish piece foam that's turned out to be a mattress topper - not sure how well it'll actually work.
Whether or not it ends up working it certainly looks great!
-
15 minutes ago, madPete said:
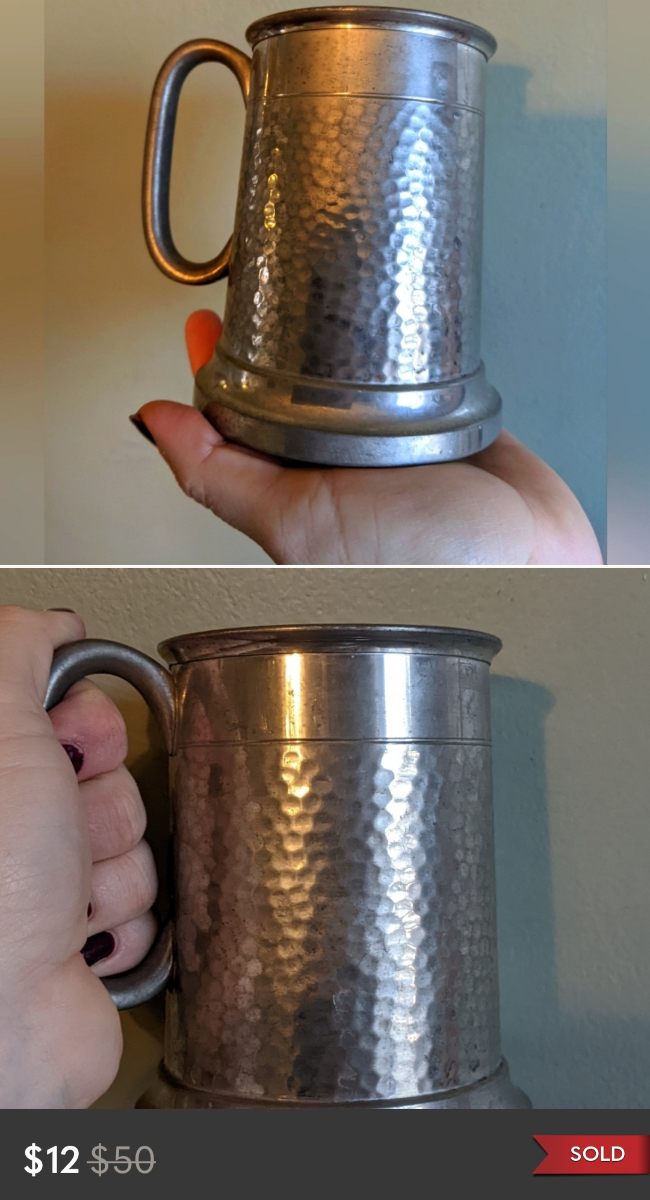
$12 - not bad. Rarely ever see them in the thrift stores anymore, most cast alloy when you do
That's why I pulled the trigger. Granted with shipping it was closer to $20 total, but for real pewter, stamped as leadless it still felt reasonable in comparison. Not my dream mug for my kit, but doesn't risk my pottery ones getting damaged in transit, is on budget and period-ish enough
-
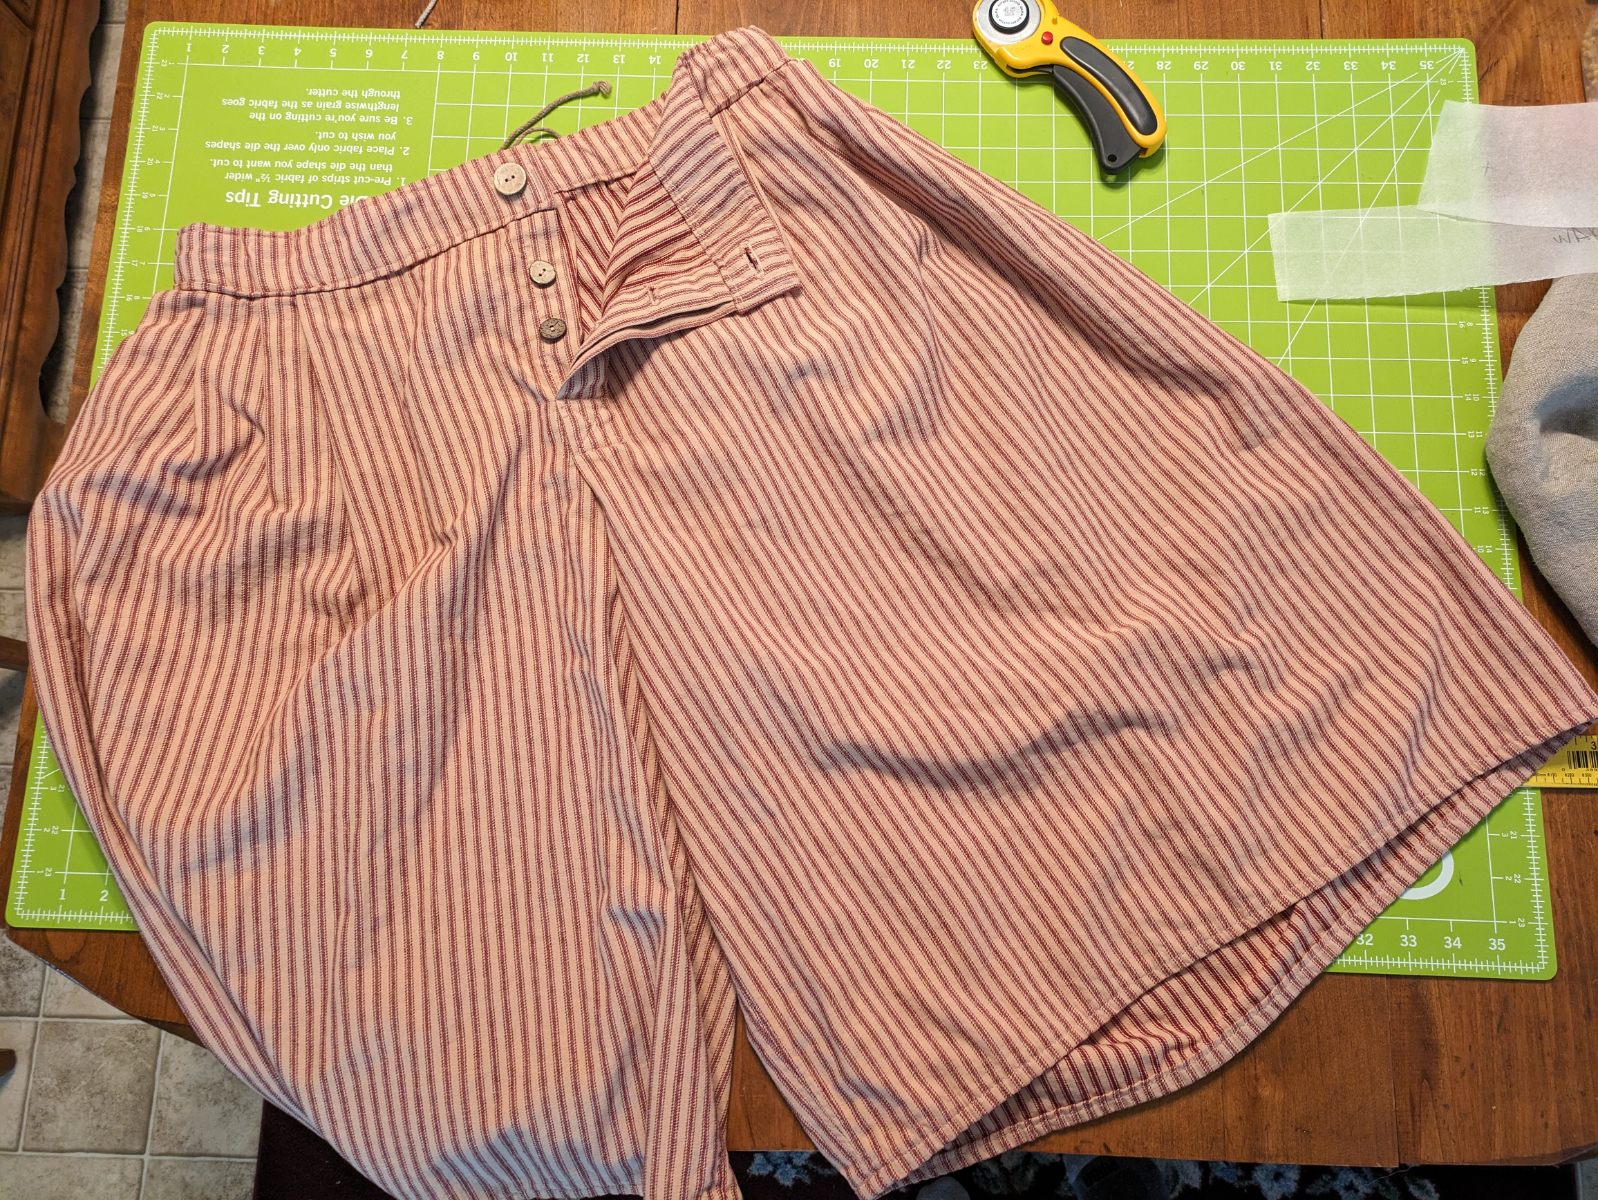
1 hour ago, madPete said:
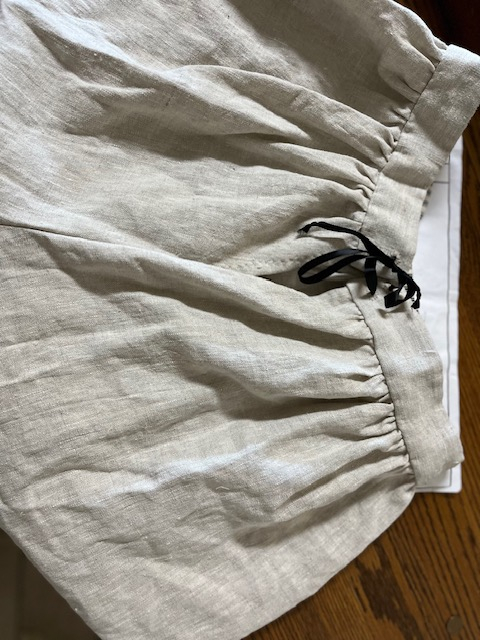
I finished a pair of slops I had started a long time ago. They were buried in a crate of unfinished projects LOL. And... finished sleeves for the two remaining shirts. Shirt Bodies and sleeve attachment next
Those shirts look so good! The patterns make me exited to cut my next one.
In other news, just "thrifted" this online.
Stamped on the bottom as leadless English pewter. I think it's got the glass bottom which isn't thrilling but it seemed better quality then the new tin/aluminum/copper mugs I was seeing on Amazon for just as much as I ended up bidding on this one if not mode
-
18 hours ago, madPete said:
I've reversed the arms (twisted one end) when attaching them to the body, and there is no fix but to reattach or remove.
I typically built one coat of outer fabric and one coat of lining with sleeves attached. Then good sides together and stitch all the way around (except neck opening). Flip right side out and then handstitch the neck opening
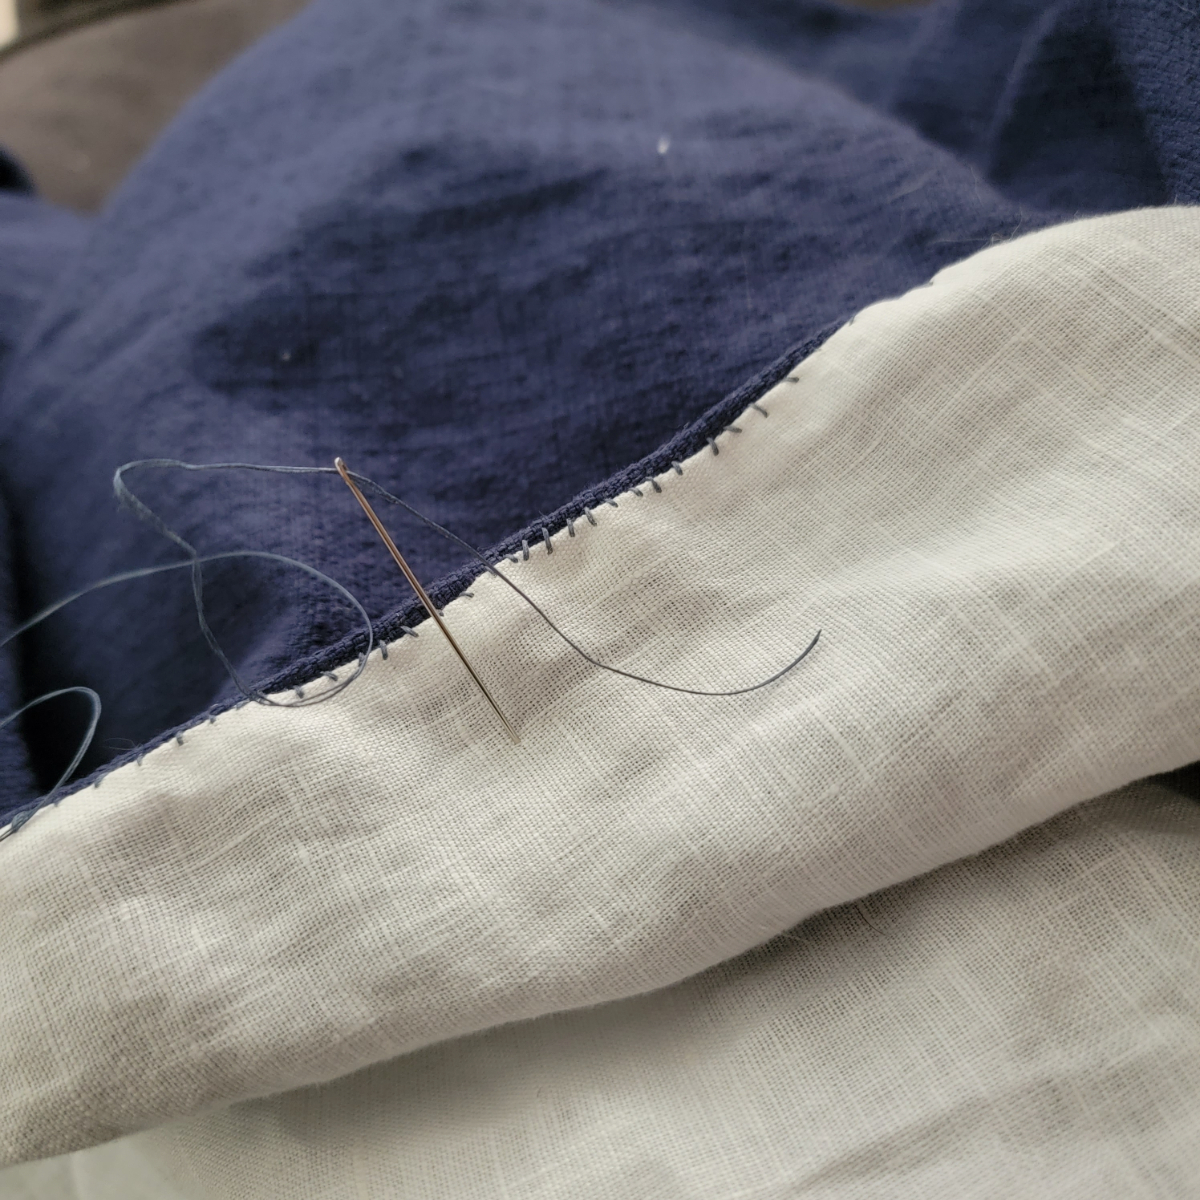
Mostly same.....I'm just whip/fell stitching the lining in rather then doing right sides and flipping, to make the lining a little easier to remove in case it ever needs replacement or to be pulled out temporarily to be bleached or something.
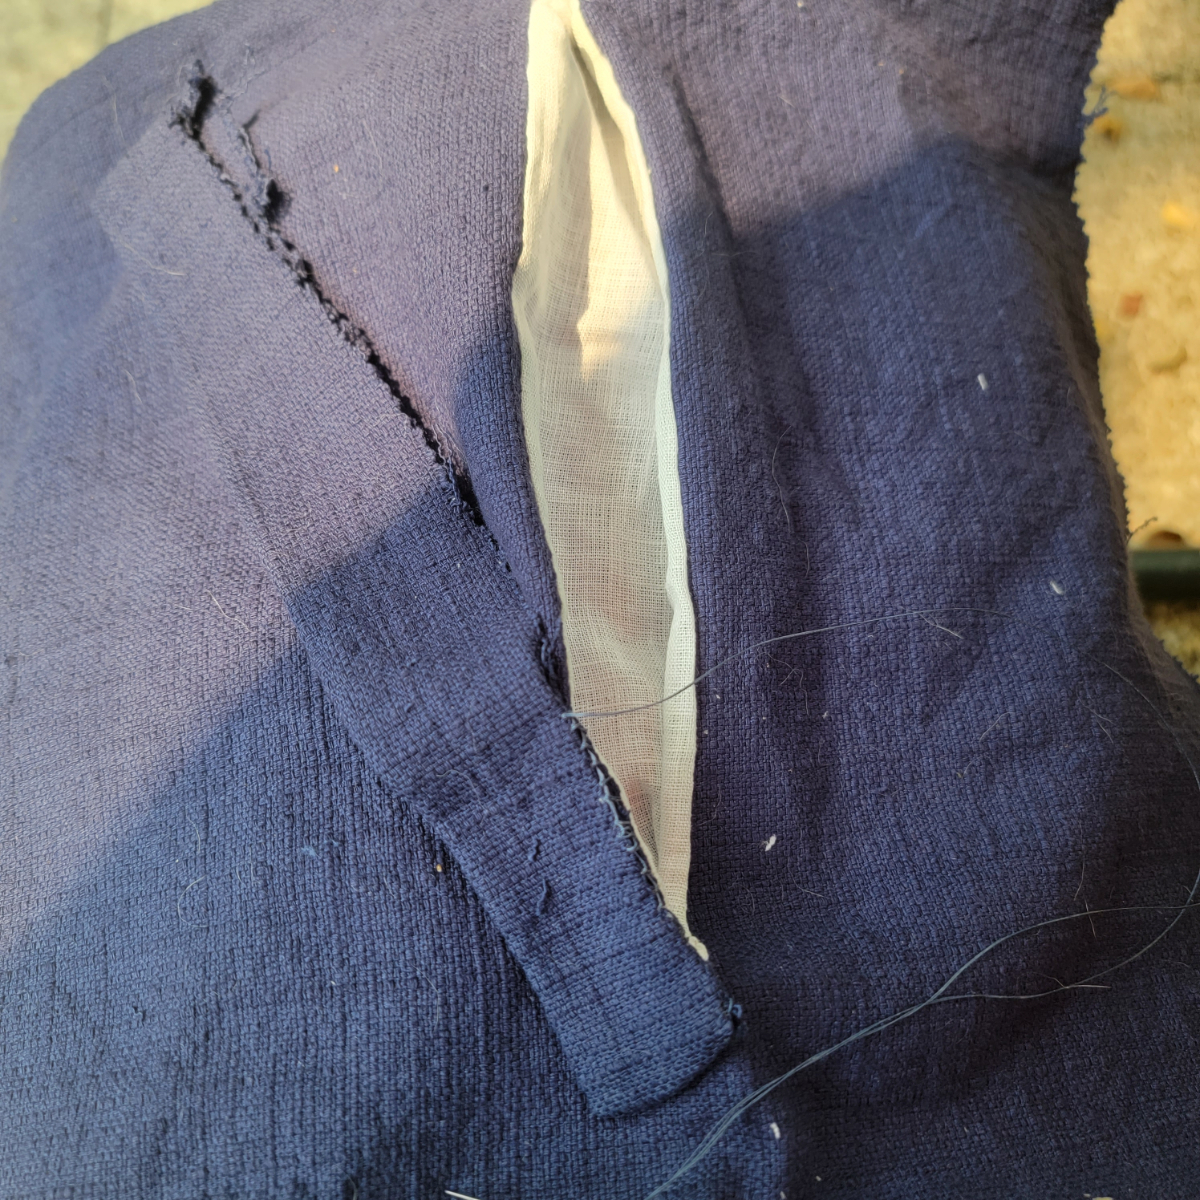
In updates to the sleeve saga, in my puttering last night, and getting ready to follow all best advice to just pull the sleeve and redo it, I determined that it's NOT the outer sleeve that's on incorrectly ,but the lining sleeve. The outer sleeve just looked janky cause of aforementioned bunching and twisting from the sleeve being too bulky and probably cause of the lining sleeve twisting it weird. So I'm sticking with my plan to narrow down the sleeves and straighten out the elbow point a bit on the outer sleeves and then will deal with the lining separately.
Might pause it though and get my second shirt and slops cut. I'm going to a different event the first weekend of August and will have lots of time to hand stitch things, but laying and cutting will be harder so best to have the pieces ready.
-
1 hour ago, Mary Diamond said:
Hmmm, that janky sleeve - everything else is looking so great, though! You are doing a beautiful job.
I personally would be tearing it off to reset it - IMHO, the amount of time you will spend fiddling to get the cuff opening to look good is better spent on resetting the sleeve.
So weirdly, the cuff opening does actually sit on the right spot.
A secondary problem that I've been mulling on is the there just seems to be too much bulk in the sleeve in general making it very scrunched. I started wondering if that was exacerbating what might actually be just a minor misalignment.
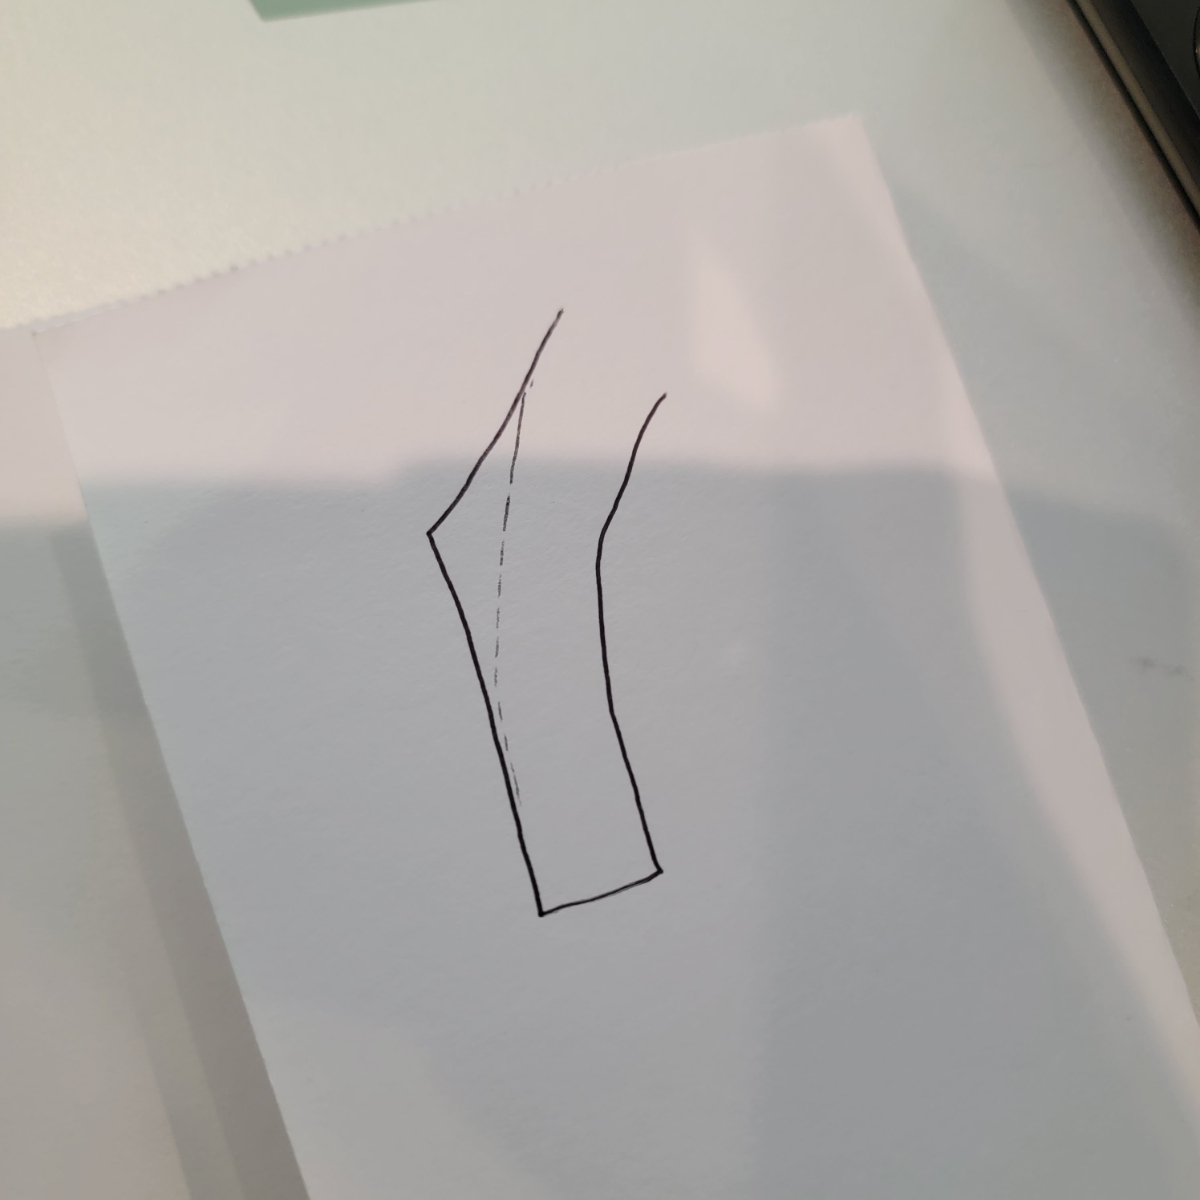
I'm thinking a good "fix" between ignoring it entirely and yoinking the whole sleeve off is to go in and basically cut out the elbow point. i have more then enough room olin the sleeve that I can go in, debulk and remove the point and still have a sleeve lose enough for movement.
(Terrible sketch showing the idea)
Losing the defined elbow point solves my problem in that the shoulder and pit and seams are all functionally and visually good....it's just the elbow shape sticking up off my inner arm that is the problem
Preliminary runs at pining provided proof of concept during my lunch break today. I'm going to try it on tonight with the shirt sleeves to make sure it has enough room and then I'm going for it as it won't prevent me if I later decide to actually reset it and it should probably happen anyway cause these sleeves really are too wide on me.
-
1 hour ago, madPete said:
what happened to the janky sleeve? I thought you were talking about the lining...
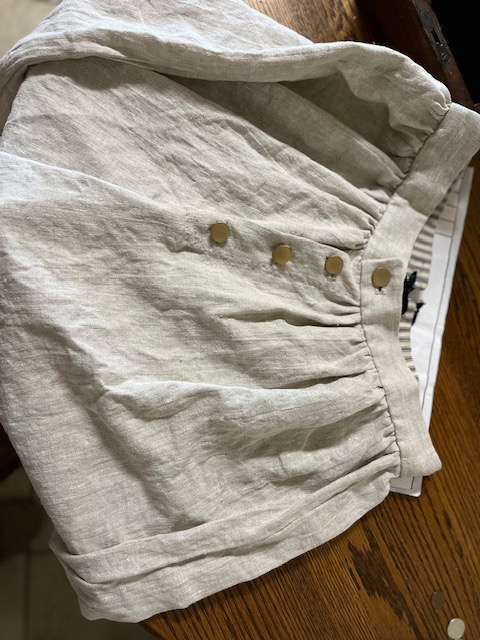
Janky sleeve is more then likely going to be ignored. If it is not however and I decide to do something about it the lining in the sleeves hasn't been done and the picture is just the buttons being laid out not tacked down so I still have access to alter.
-
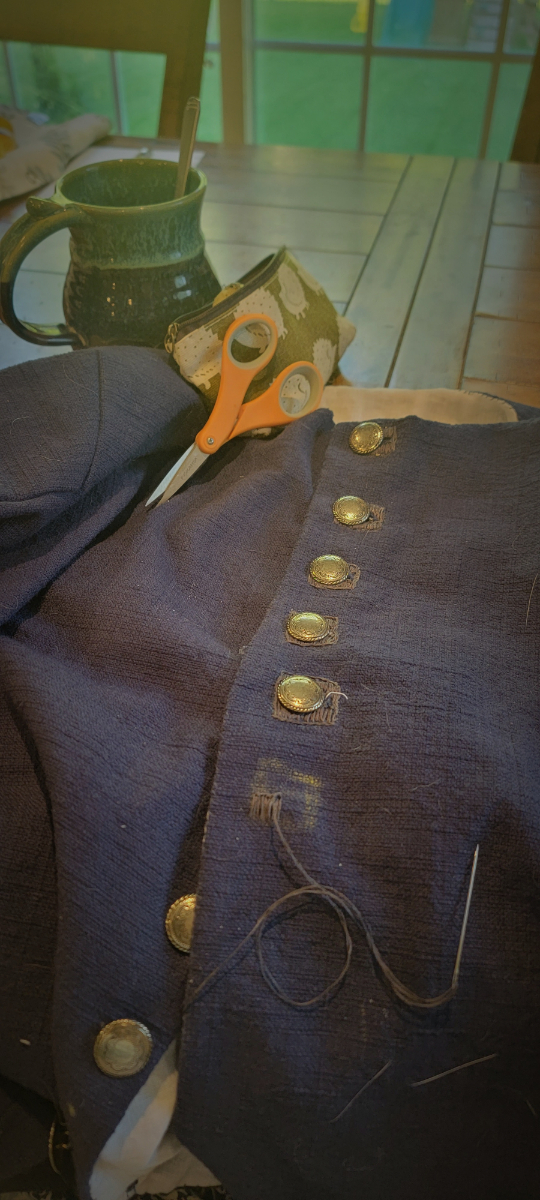
Upside, i just laid out my buttons and even with the janky sleeve.......eh? Can't complain. It's got style
-
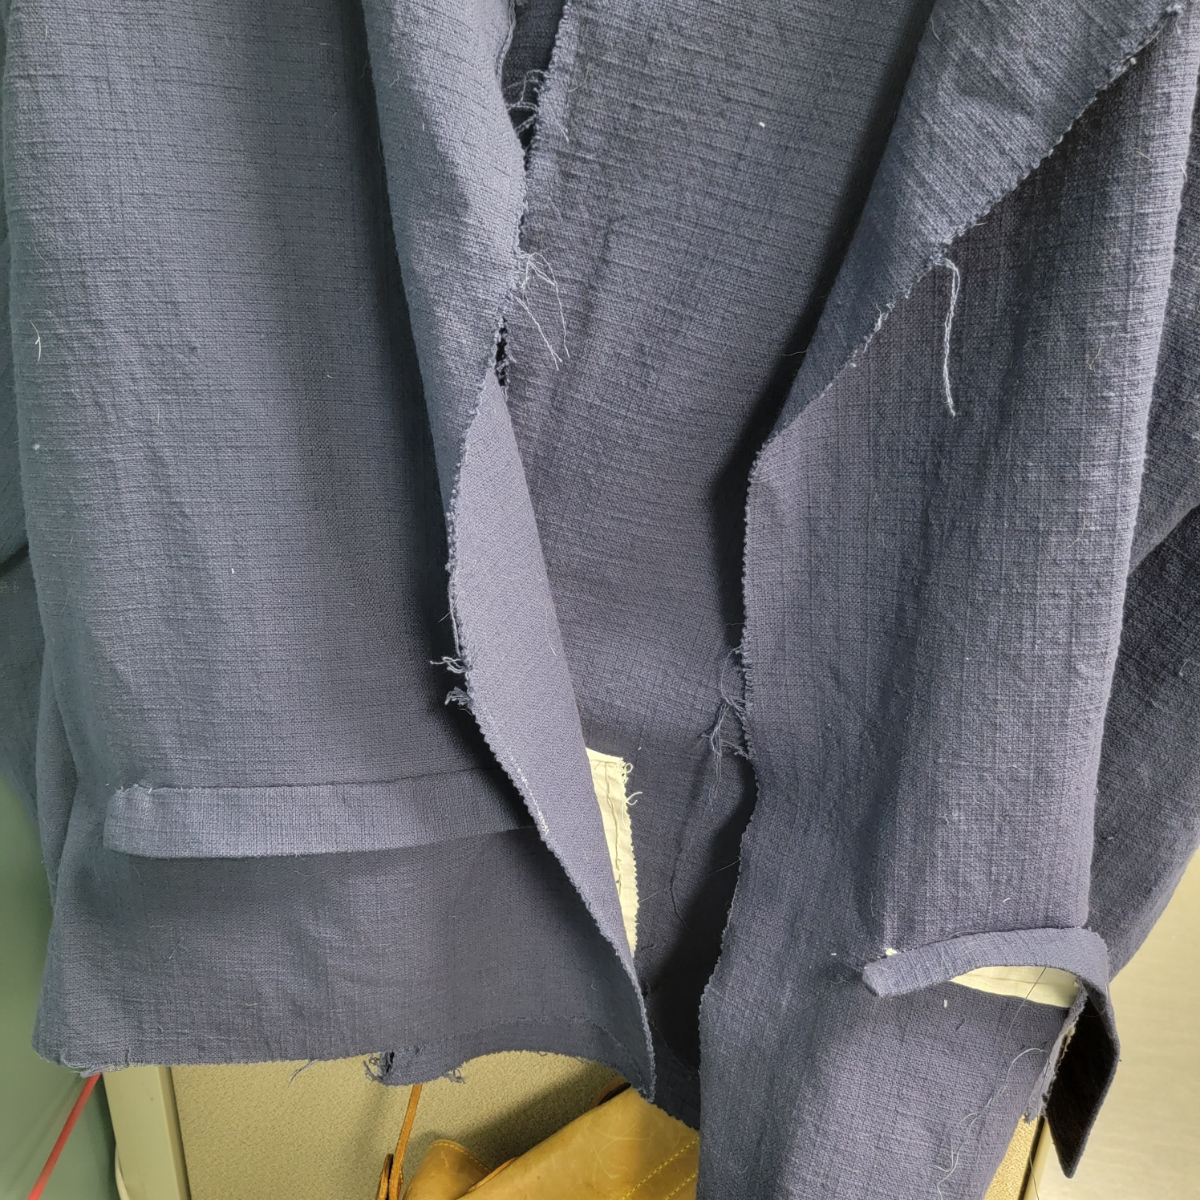
Update....lining is in but one sleeve got put in upside down so the elbow vend is the wrong way. Haven't closed up the lining entirely so contemplating flipping it inside out and just re-reseaming the sides to lose the elbow point, and lose some of the excess width anyway.
Ooooor.....calll it good enough cause when it's on the sleeves have enough allowance you can't tell and I really want to be done with this one and move on to the next....
-
29 minutes ago, madPete said:
If you search for "metal shank buttons" on ebay, sometimes you can find plain or simple metal buttons. brass buttons are expensive these days...
example:
Those are nice! Everything I found heretofore has had the nautical pea coat anchor motif on them (or periah the thought, tacky Halloween costumes looking skulls and crossbones)
-
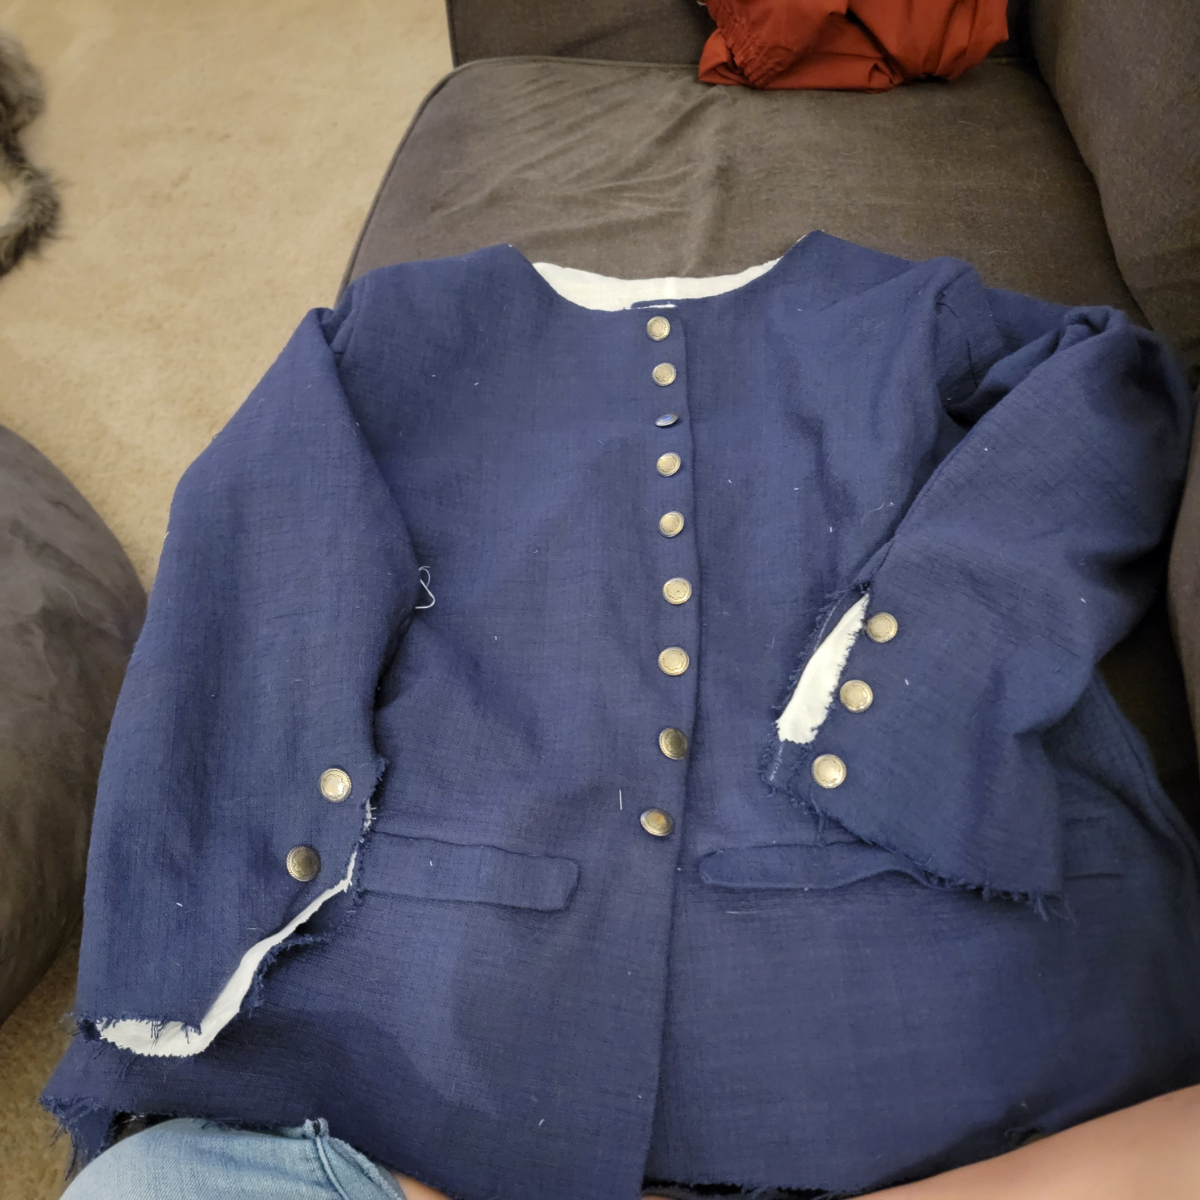
Finished the lining and started putting it in the shell this morning. Got excited about it, and how close to "done" I was....till I remembered that i still have to do buttons and buttonholes after this is done 😐
Which, part of me thought I'd just do cloth covered buttons but.....not happening. Metal buttons it is..i think I have enough in my stash but if anyone has s good source on buttons to share I wouldn't mind suggestions.
After this, another shirt, another pair of slops, some skirts, a waistcoat if I have time....
-
19 minutes ago, Mary Diamond said:
Enjoy! My order from Chagrin Valley (thank you for the recommendation, Tudor Smith 🙂 ) came 2 days ago. Looking forward to trying out the bug salves and hair shampoo bar. 🙂
Hope you enjoy them! Solid shampoo bars have been a game changer for my hair in general and definitely also make travel easier. Bonus that they should also be biodegradable for camping use!
-
On 7/16/2023 at 3:35 PM, madPete said:
I think taller eliminates dampness but increases chill. The ground provides insulation. Less air circulating underneath you when down low is a good thing. I would even stuff things underneath to block the air. I was a on a normal height cot at one event in Northern arizona, with 2 wool blankets doubled up underneath me, one on top and a wool great coat and I was still cold. Yet when I sleep on the ground on a self inflating camp mattress (1-1/2 inches tall at most) I'm fine with a single blanket underneath.
Yep I would tend to agree. You want up off the ground a bit but too high and it certainly gets drafty. I'm hoping this short height will be a good compromise as well as easier to transport and less legs to conceal.
I have a short trip the first weekend in August that I will get to test it and make any adjustments....the climate I will be in will be quite a bit different I imagine but still a good chance for a trial.
-
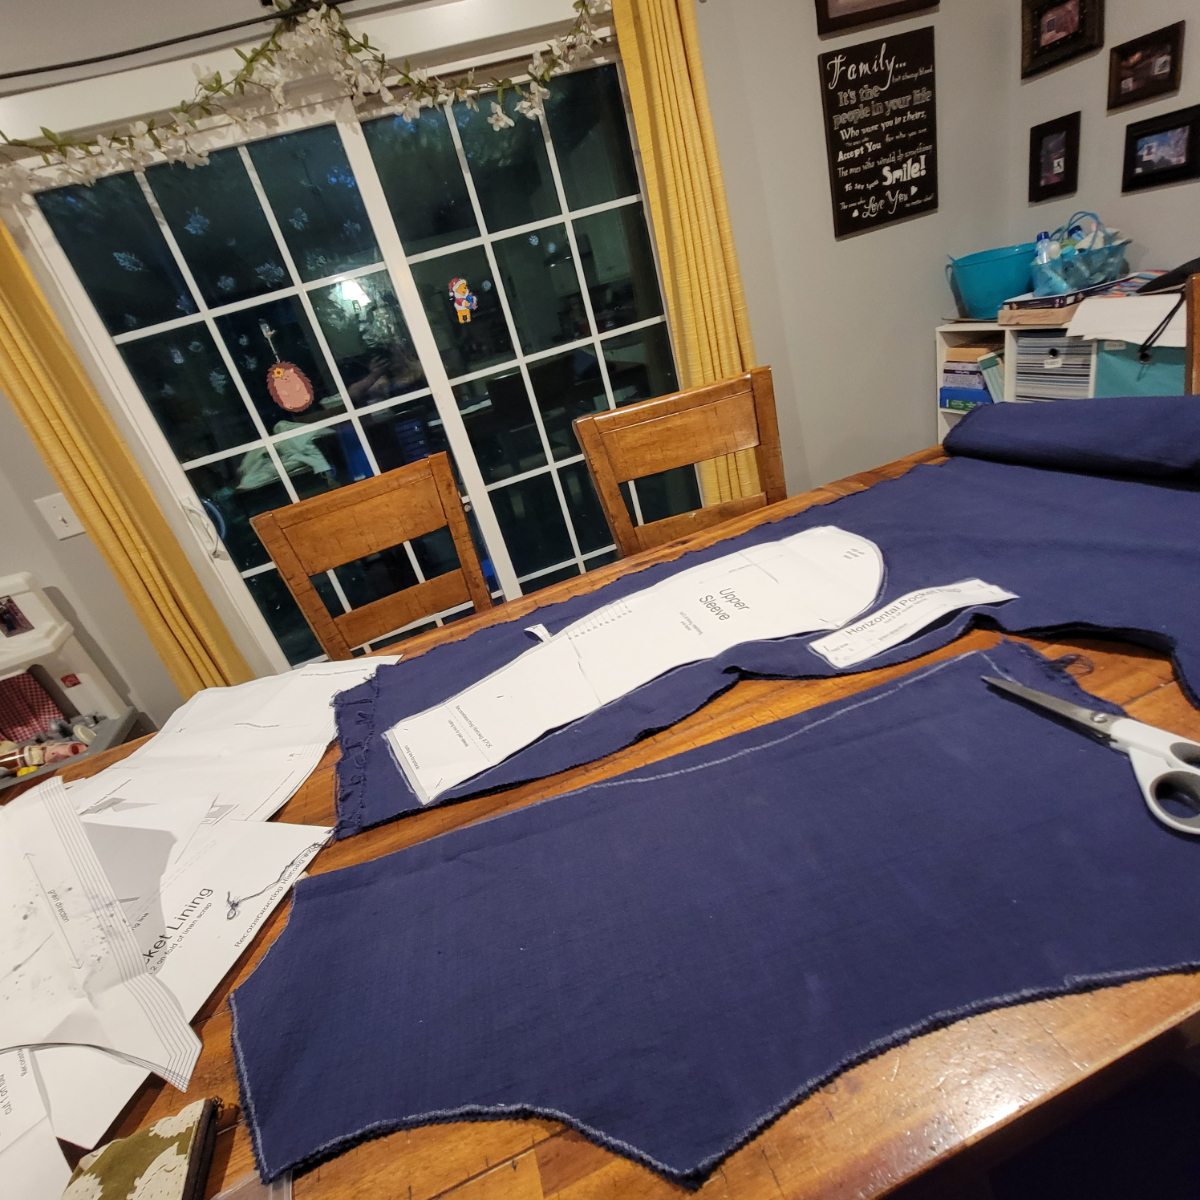
It's always amazing to me when the little fiddly bits feel like they take just as long to do as major construction parts....
1 pocket done.one pocket 3/4th done. Hopefully finish that tonight and get the lining cut. Definitely going collarless on this one.....I'm over the little time sinks....
-
2 hours ago, madPete said:
Nice! I have a short cot like that also, but uncomfortable. Maybe the mattress would fix it. That does give me an idea...
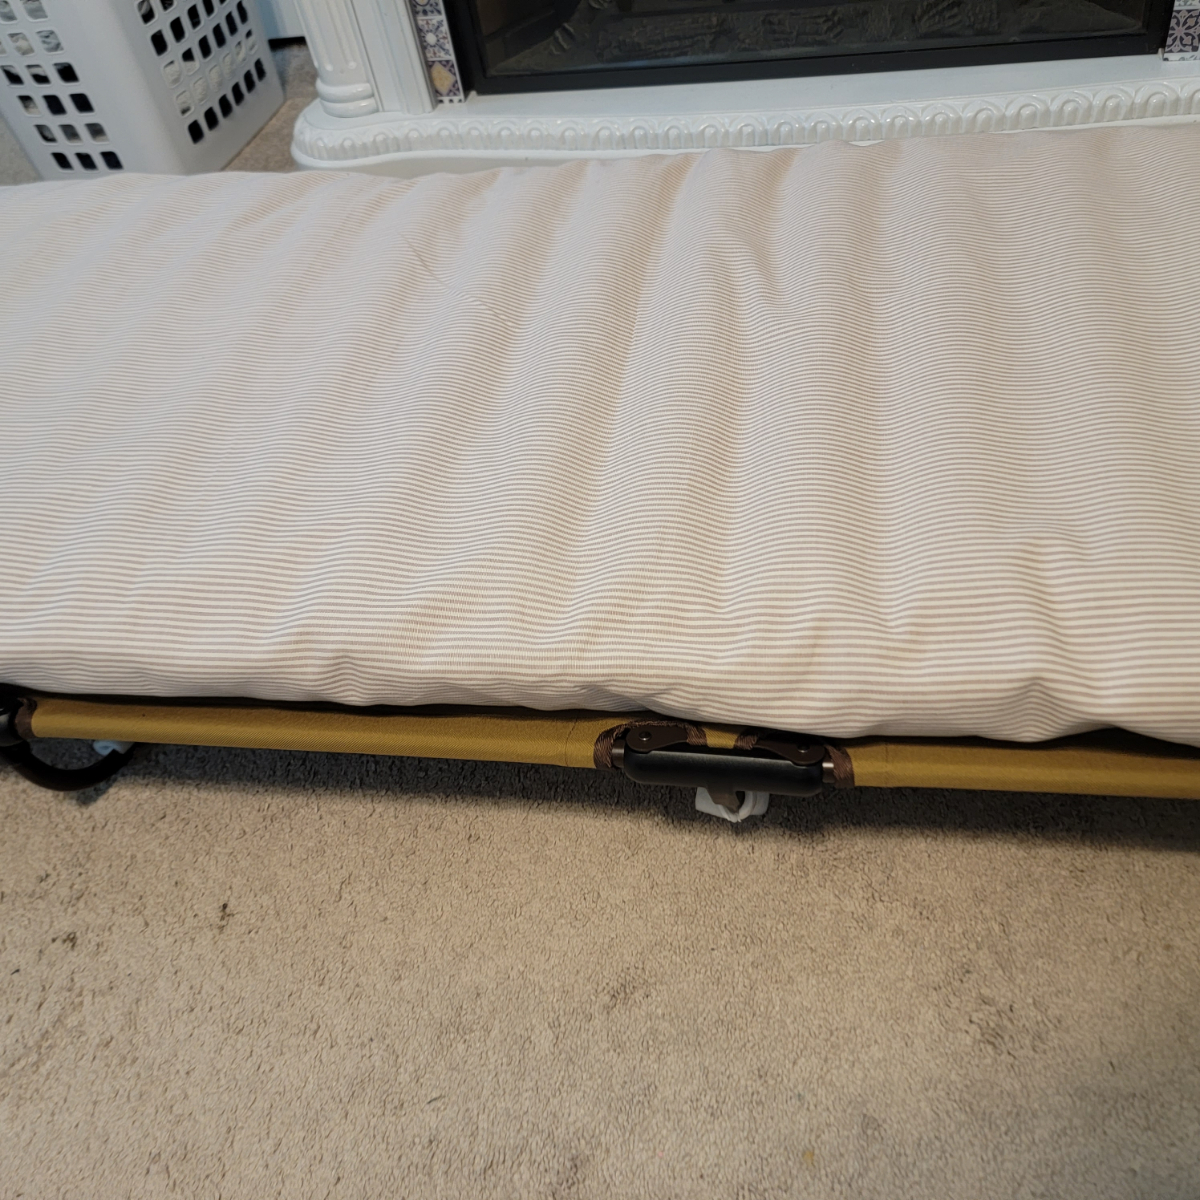
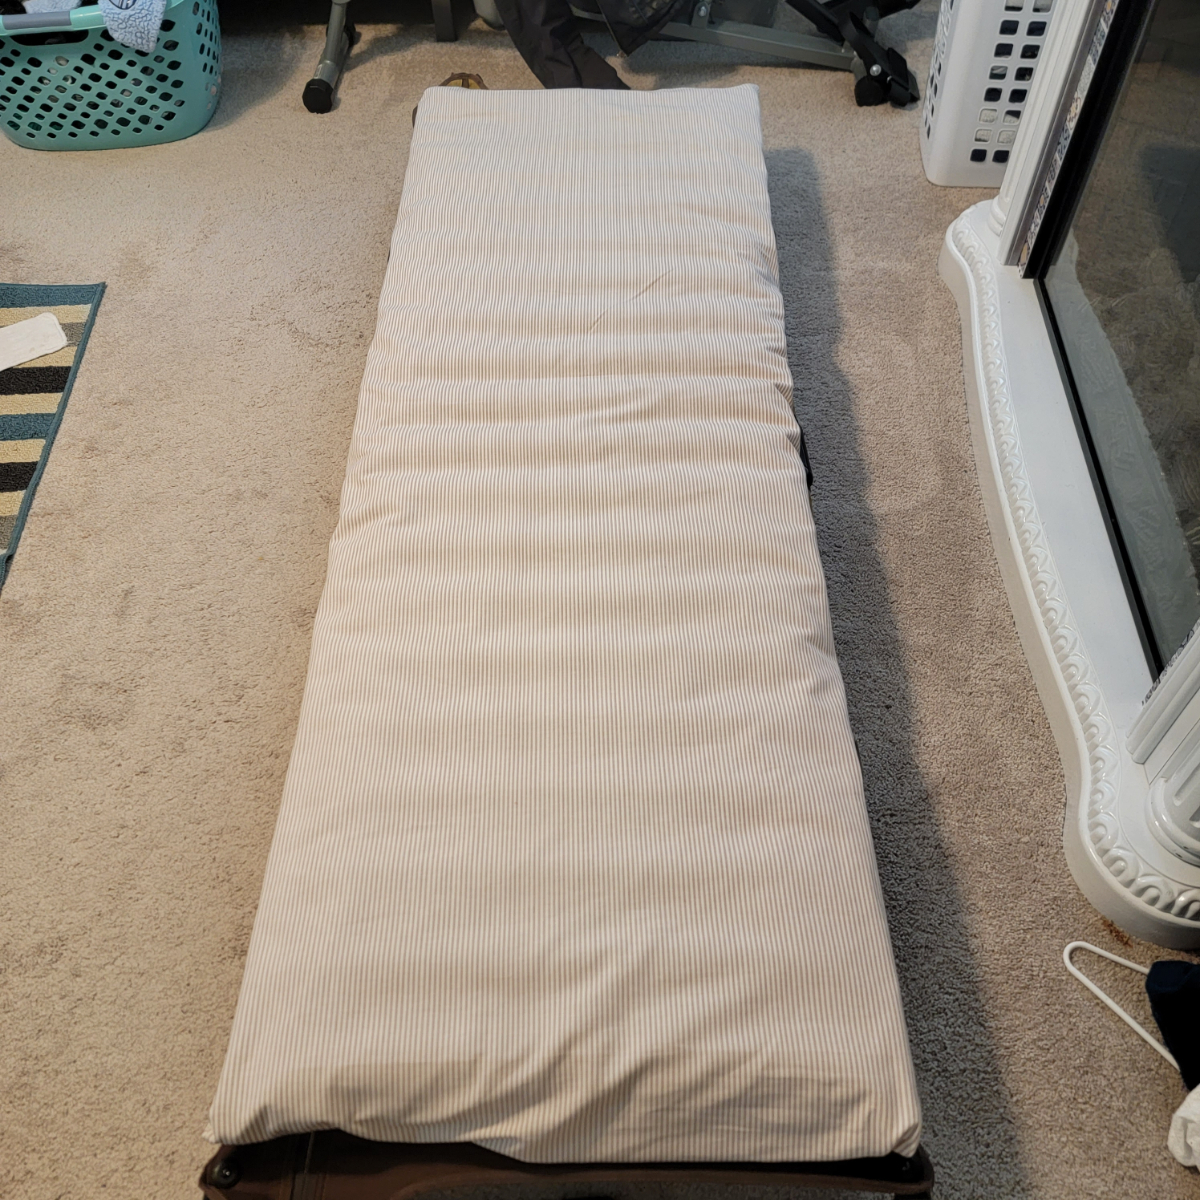
Yeah the cot is only minimally about comfort. I mainly need it as something to get up off the ground to cut the damp and chill. Obviously longer legs would provide that even better but not so much to warrant the extra packing space. I have to say this does feel much more supportive then the old Colman camp bed I used to use.
The camp pad really has been the good find. It's narrower, but sturdier feeling then a regular air mattress. It definitely feels more firm/less prone to sag too. It said on Amazon that it had like an r3 insulation level....which I doubt, but better then a wholly uninsulated conventional air mattress. But I plan on lining the bottom of the mattress pad cover with like an emergency blanket or something to help insulate, and blankets on top should do the trick
-
So jacket shell is constructed. No pics yet but might get some later. Pocket,/flaps and lining. Might go without a collar.
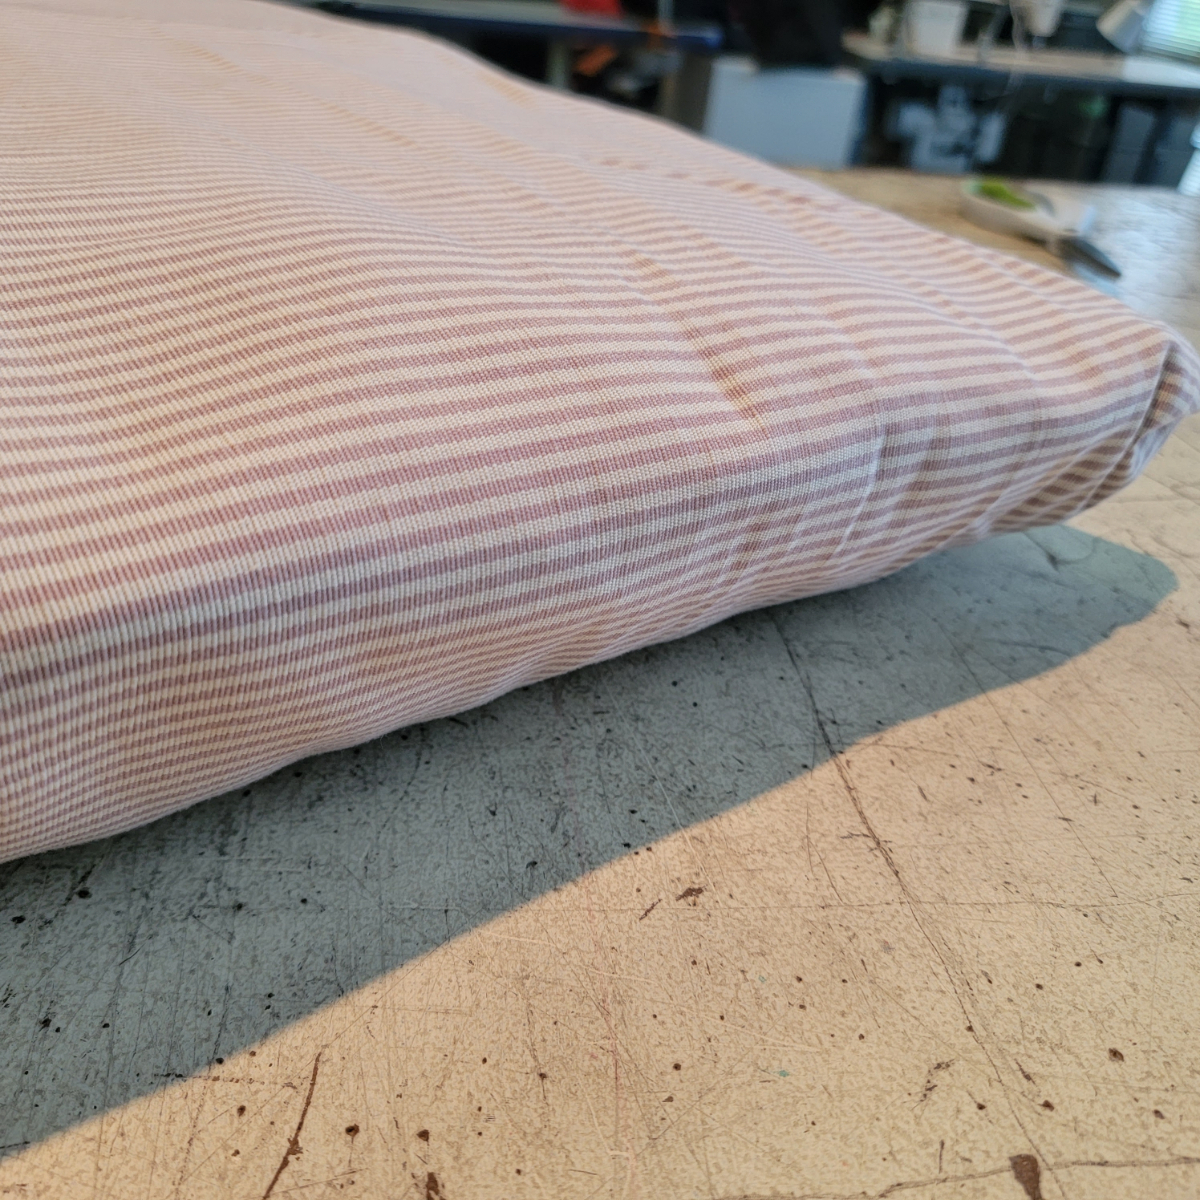
But on other projects front....i had pulled the trigger on a cot/camp mat configuration. In an effort to disguise it/make it look more period I took some of that roll of striped cotton Essex I had and made a cover for the pad so it looks more like a mattress. Might also make something to hang over the edges to obscure the cot frame too, but all and all, pleased with the look. A wool blanket on top, a down pillow and it should look decent, balanced with comfort and ease of transport.
Back to the jacket next....
-
1 hour ago, madPete said:
First, this is an optional buy-in. You dont have to buy in to any specific meal or any meals at all. Every single Mercury member will be from out of town and we dont have the luxury of our own kitchen or knowing what grocery has gluten-free/peanut free whatever to meet specific allergy requirements. If this is a concern, I recommend individuals make their own plans or review closely what we propose as a menu and ask questions at the event. We'll do our best when we get there to choose ingredients wisely, but the likelihood is we wont know specific brand ingredients until we get to the local grocery and see what is available.
This makes sense and honestly kind of relieves me. My logic in asking was that if accomodations were to be made best to know about them as far in advance as possible, but I agree with with the sentiment that this is an optional buy in, with limited resources.
-
1 hour ago, madPete said:
I'm building a spreadsheet to include:
1) Menus/schedule
Breakfast: Fri/Sat/Sun
Lunch: Thu/Fri/Sat/Sun
Dinner: Thu/Fri/Sat
2) cooking tools and who is providing
Utensils: Stynky
Cooking pots/coffee pot: Chris
camp grill: Chris
Dutch Oven: ?
dishwashing basins: William and/or Stynky
3) Volunteer list
Breakfast: Stynky
Lunch:
Dinner: Pete, Tudor Smith
4) Shopping List
TBD
If I may suggest that we add a category on the sheet (or at least a running list somewhere) of any food allergies/dietary requirements other then veg types... easier to plan any accommodations if we know ahead of time.
Otherwise, trawling through recipie collections for the unicorns - easy, scalable for a crowd, wide appeal, fairly stable ingredients and able to be done on a fire lol
-
23 hours ago, madPete said:
If yer shirt is long enough, ye wont need a lining!
Old fashioned problems require old fashioned solutions lol
-
5 hours ago, madPete said:
1) Volunteers willing to help on the cooking end?
I can definitely volunteer for a few shifts. It's been quite a few years since I've cooked on a fire but I'm pretty decent at cooking otherwise
5 hours ago, madPete said:3) Anyone have a Dutch Oven they can bring?
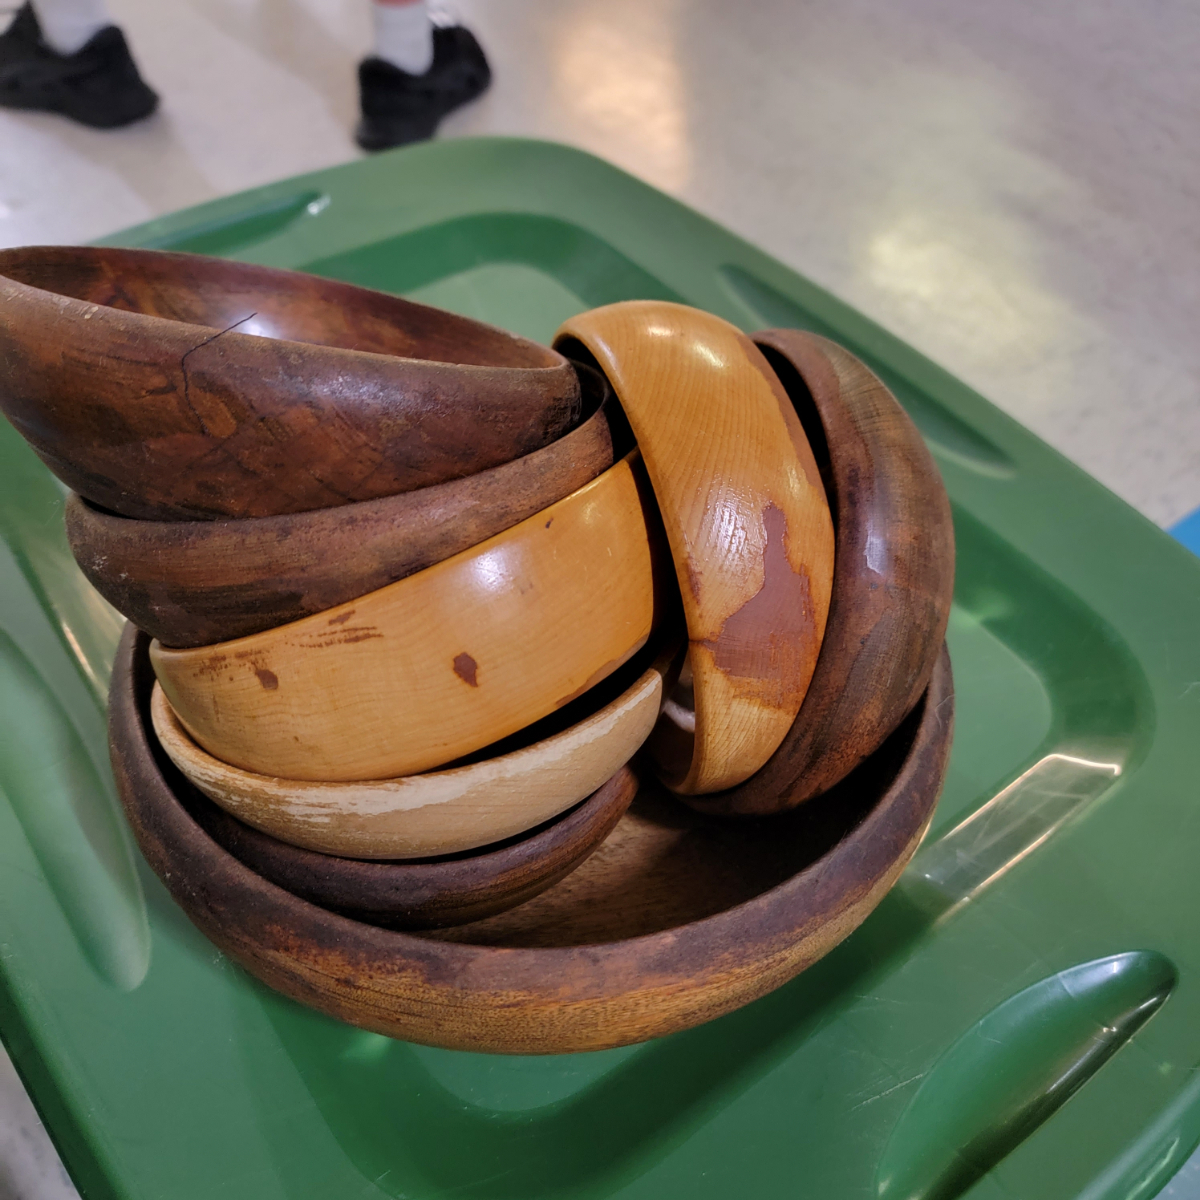
I do have one I'm willing to offer up for use but 2 caveats....one, it would require a volunteer to take it with them since I'm flying (along with the extra wood bowls etc that I found that I'm willing to share) and 2, it's enameled cast iron so about 100 year minimum out of period. So...not the best option maybe, but available if needed
5 hours ago, madPete said:We may be able to purchase fresh bread and butter at the fort. There is a group there that demonstrates this. We might even be able to use the ovens when they are fired up.
I also have some bread skills....never in wood fired ovens but I certainly wouldn't mind trying my hand at it if we do get access to them
5 hours ago, madPete said:Maybe something like $5 breakfast/lunches. i.e. bagels/oatmeal/fruit for breakfast, sandwiches or the like for lunches, and $10 for dinners (stews, period dishes, greens, etc) depending on numbers and final menu.
We also need to keep in mind the vegi-saurus' in the menus
Those breakfasts sound delicious and easy. And while I'm not a full time vegi-saurus, having some options would be great and I might have some good veg/vegan recipes floating around that would lens itself well to camp cooking
-
4 hours ago, Stynky Tudor said:
Your breeches came out looking great! How well is that linen weave working for you?
After a recent (blood pressure) medication reaction, none of my breeches fit. So I'm in the middle of sewing extra large breeches for meself - one pair down!
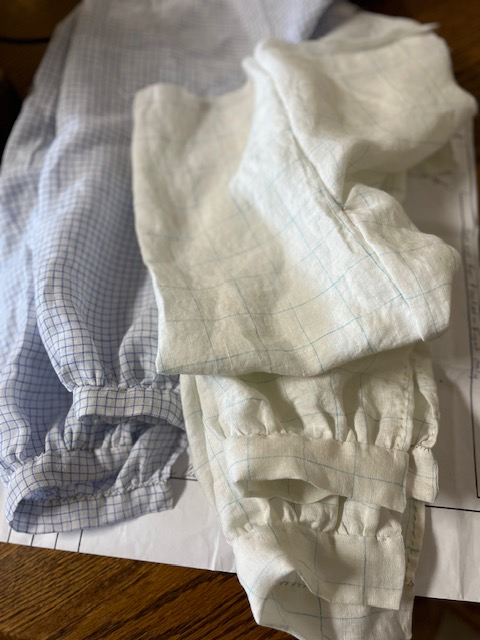
I'm working on a second pair of linen slops. The material seems a bit of a course weave, maybe even shear. TS, are the breeches you made lined or just bare material?
The linen worked great! Mayhaps technically to lightweight but not badly so and for the climate I was willing to go for a slightly softer drape for the sake of comfort. It's just heavy enough too that o didn't have to line. I'm actually finishing up flat felling the interior seams on them right now since they arent lines til I can get home tonight and pin my jacket sleeves.
Love that striped fabric. They look great! I thought about doing the wide/petticoat style like that for my second pair but I'm not sure on if I could pull off the look lol. But we shall see. Next priority after the jacket is a mattress cover. After that is another shirt. After that is more slops. Busy busy busy....
-
They need a bit of a clean up, and I probably wouldn't use them for soup, but I just scored this stack of wood bowls for $5 if we need extra among the camp

-
Ok, birthday party for the wee mutineers has been accomplished...seven mini a frame tents and all. Proof my lackluster singer is not up for any heavy canvas projects any time soon if nothing else lol
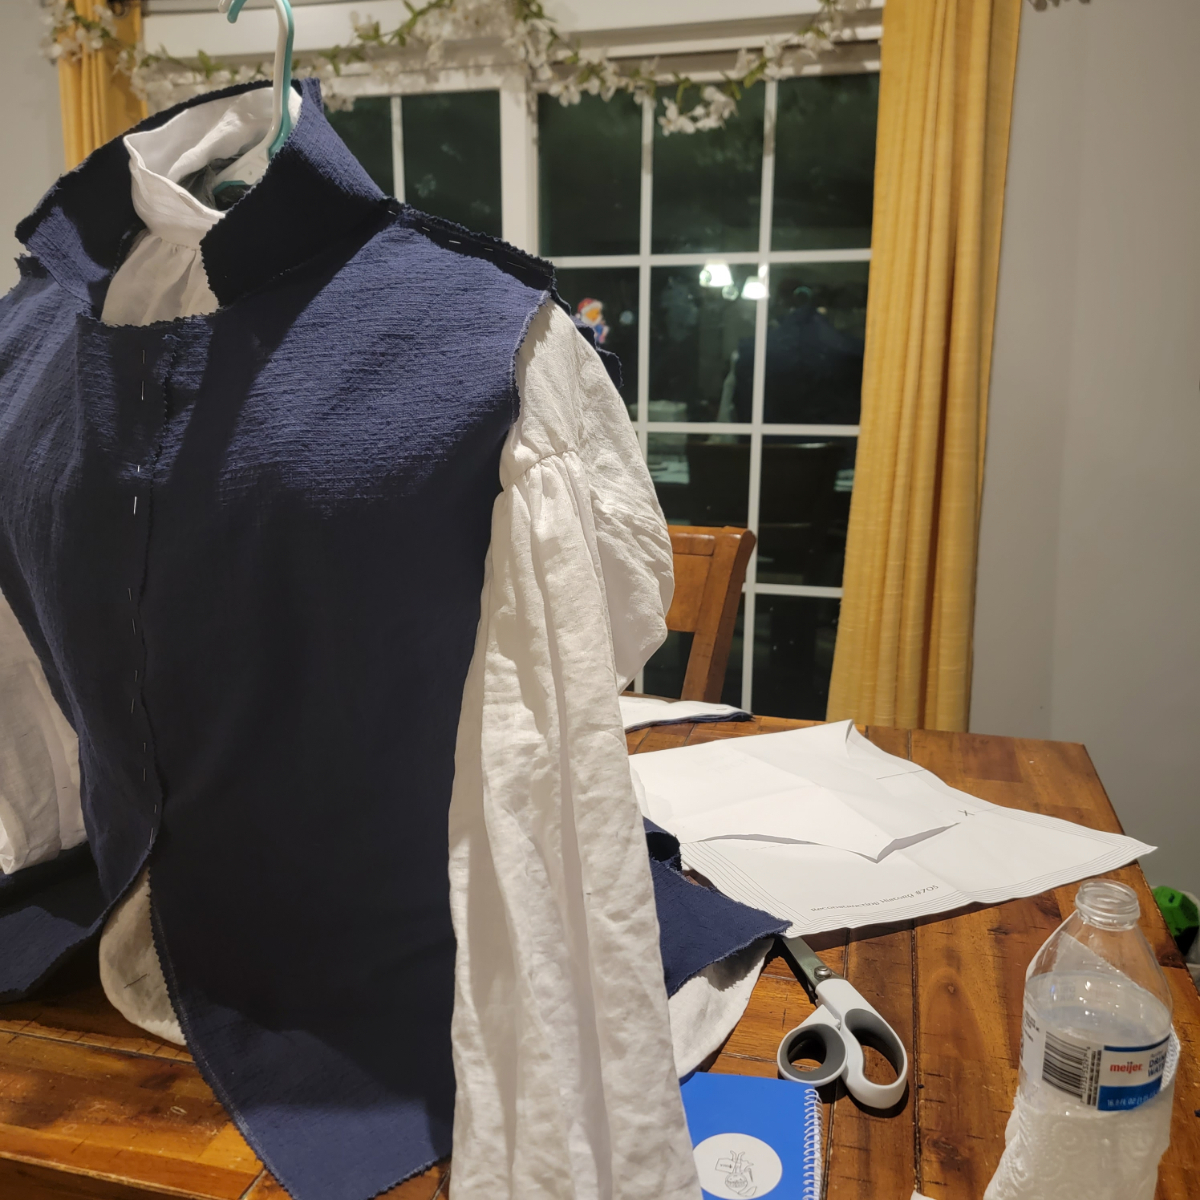
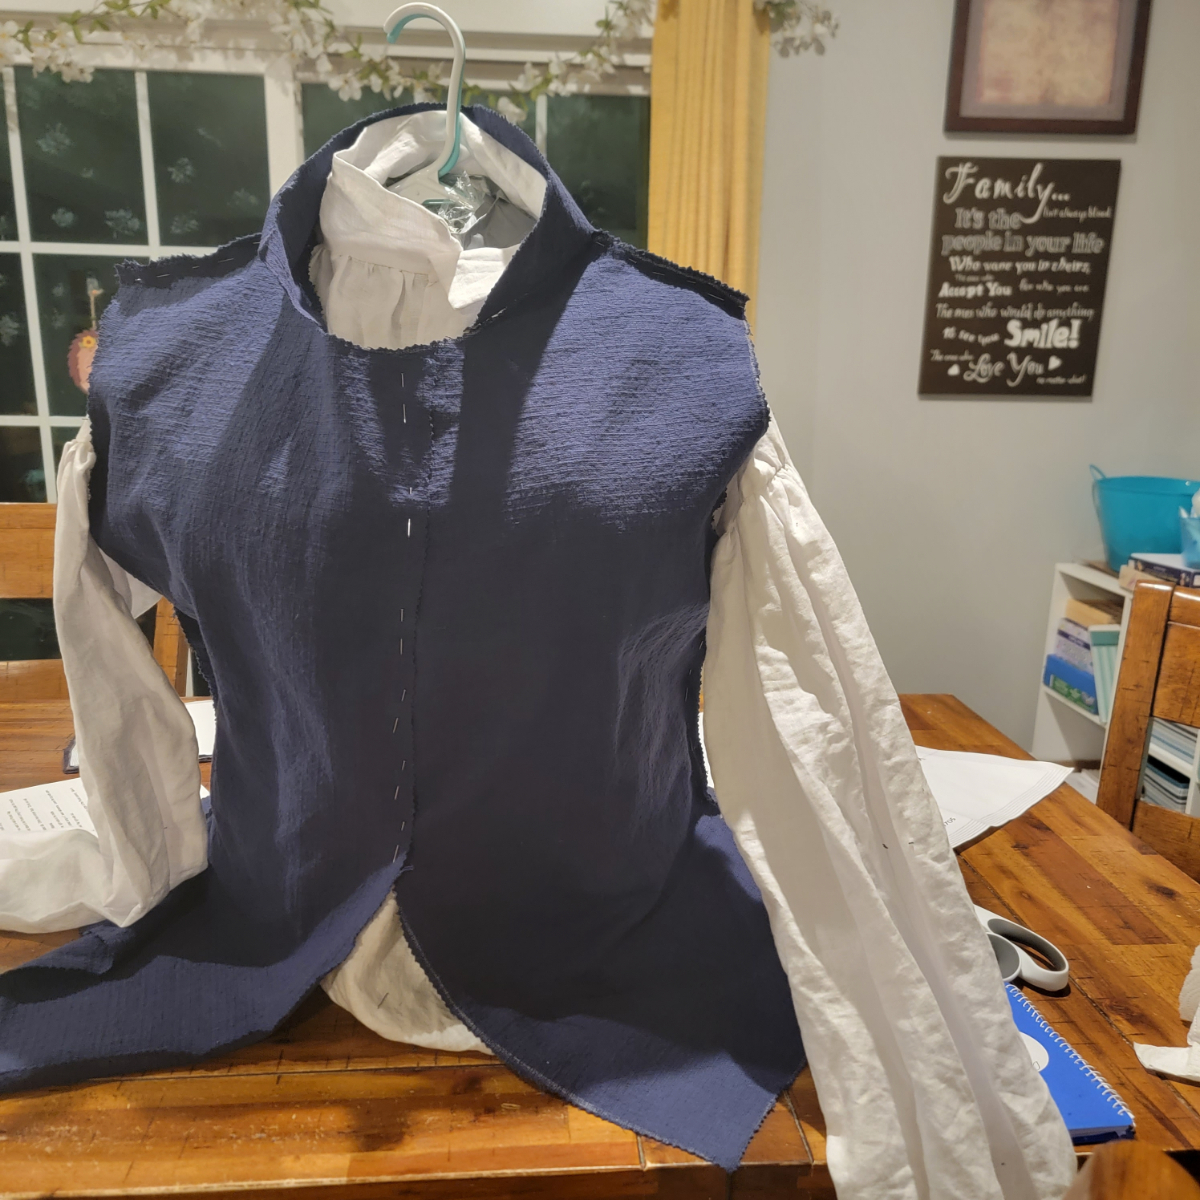
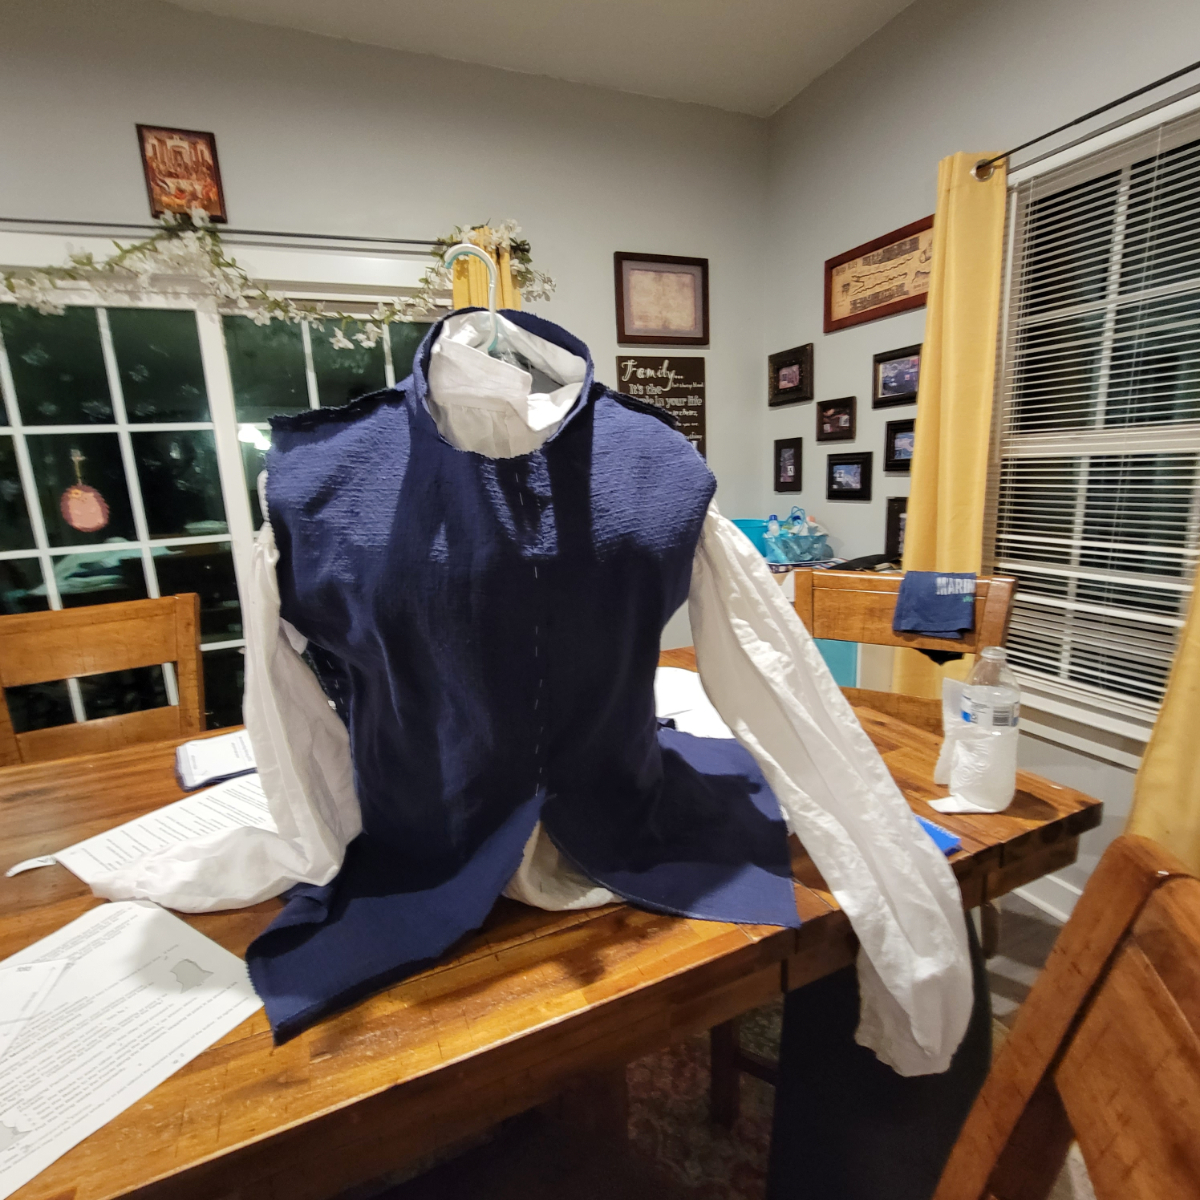
But cracking on with the garb again.... Jacket body is pieced together, sleeves are getting pinned tonight, hopefully collar too, but that might have to wait until lining Is ready, need to reread the instructions again tonight.
Fit is mostly ok...felt a bit bulky right over the chest when I first started sizing it, but then tried it on my actual body whilst wearing the shirt and stays, instead of my slightly janky duct tape dress form or modern clothed self, and it actually sat pretty well....well enough I knew to stop frassing with it lol 😉
It's not a perfect fit but it's really very decent, and again.... I'm portraying a woman wearing men's clothing, probably borrowed or stolen, living aboard a ship... Finely tailored would be a luxury, not a commonality.


Making a full kit in four months
in Crafting Kit
Posted
Ok ok, I'll stop whinging about my >20 that I've done on this jacket lol.
But seriously, that looks fantastic and well worth the aggravation of doing it.
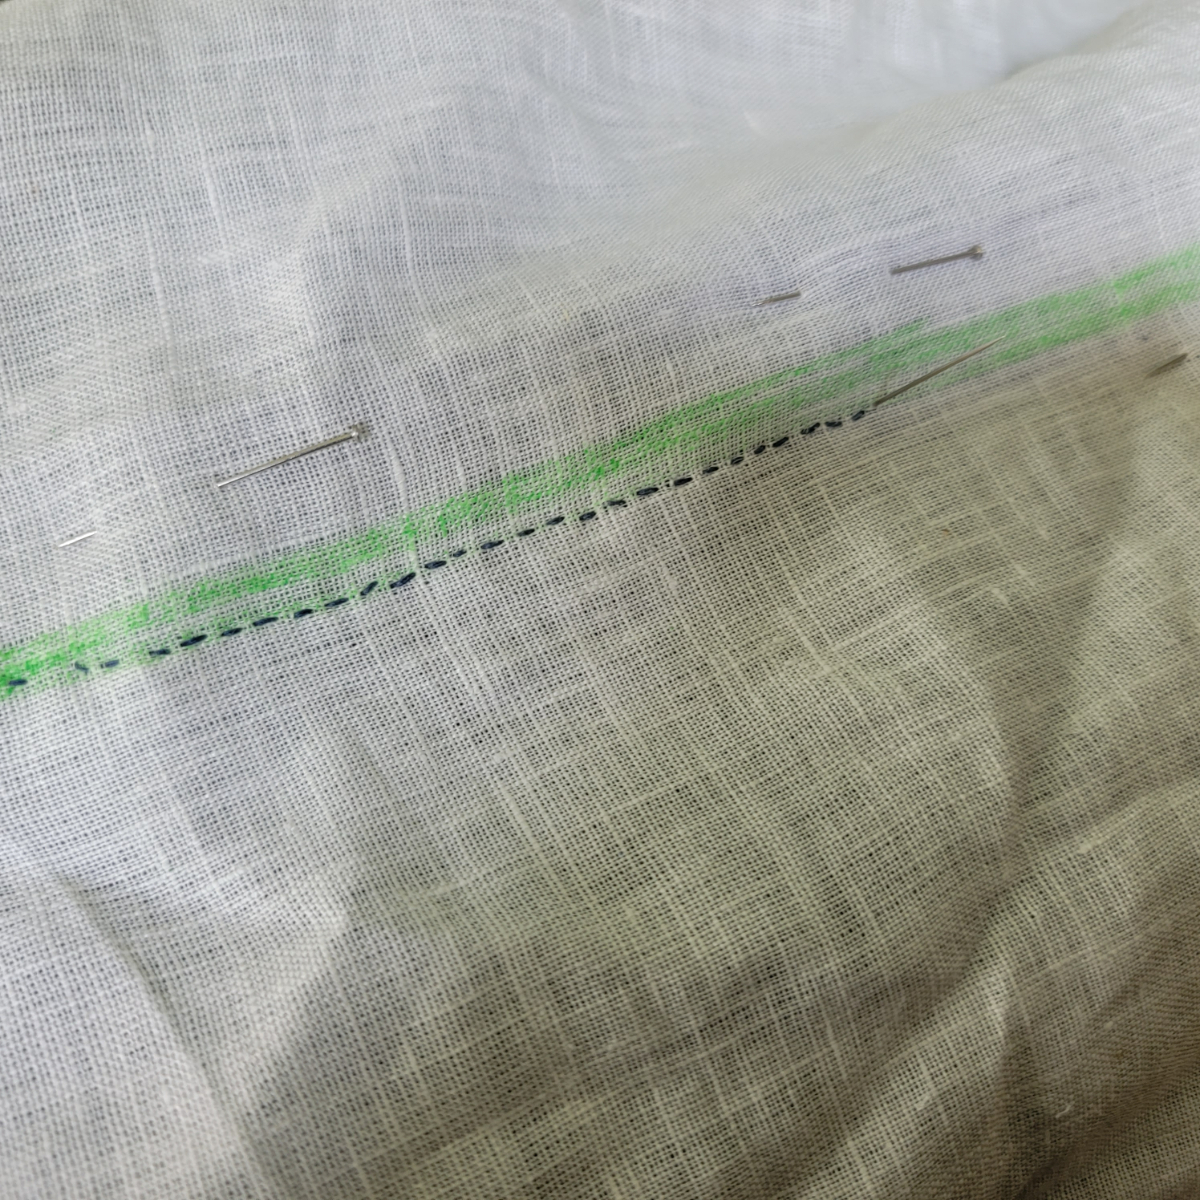
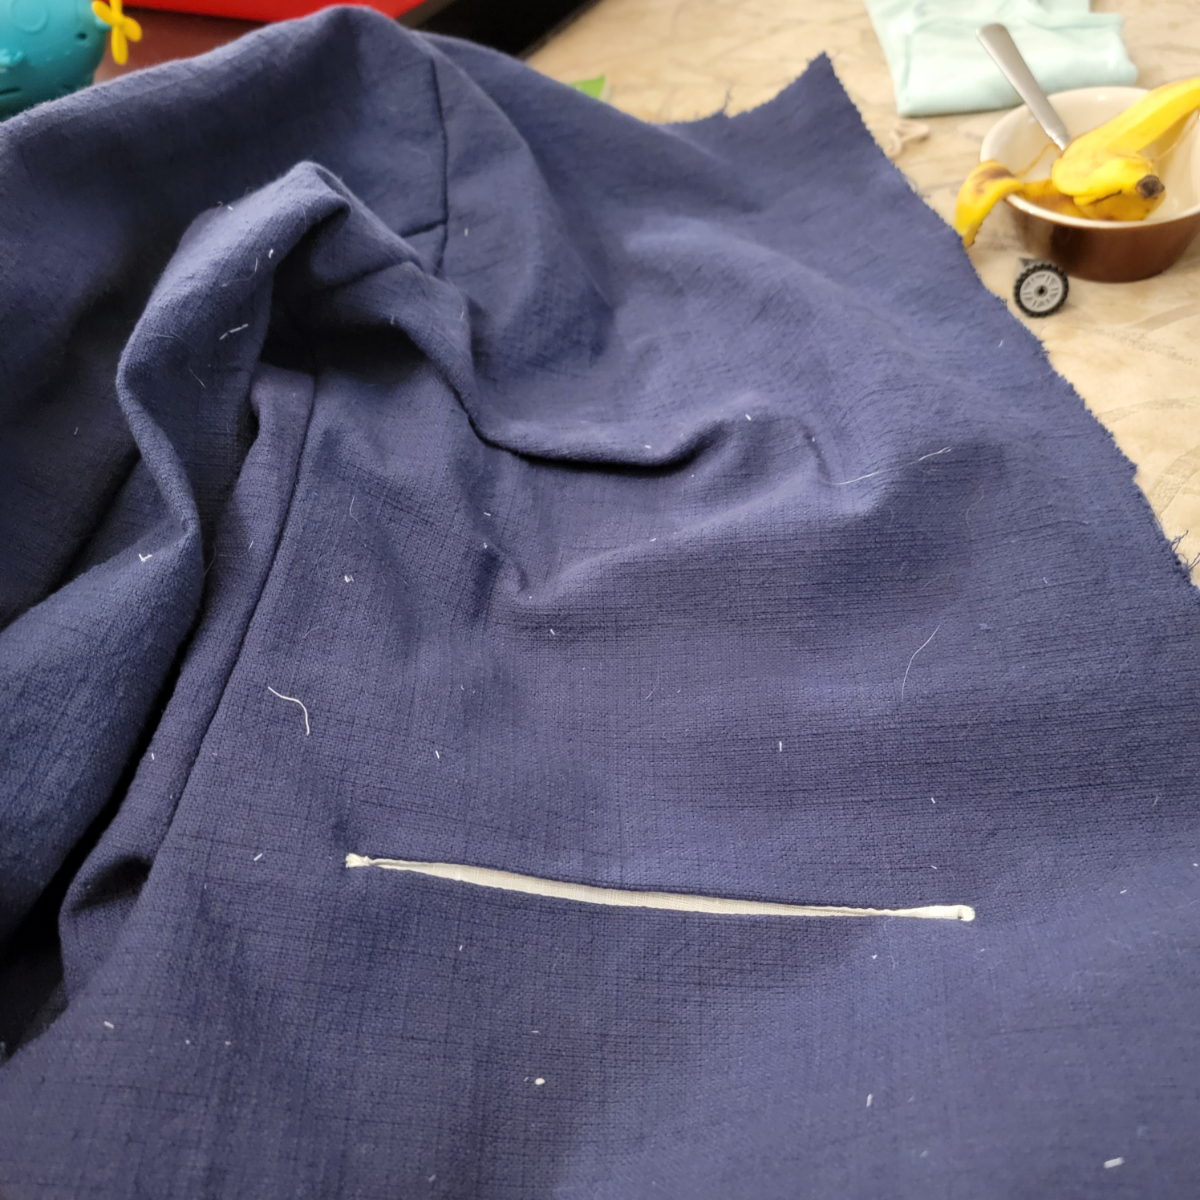
Any tips for keeping them tidy and even? Short of me figuring out the button hole setting on my sewing machine lol.....do you cut then stitch or do you do stitch then cut. Per what I've read I've been stitching then slicing open and it has helped keep them a lot more even and flat and less gappy but I feel like cutting then buttonholing around the existing slit feels.... sturdier? Definitely less bits of fraying fluttering around.
In other news my pewter mug arrived. Needs a good clean, and determined it was in fact a "glass" bottom which isn't thrilling, but otherwise, it's a good sturdy real leadless pewter piece. Well worth the $20. Might talk husband into making a leather wrap for it for me. Not sure of it's period correctness but will help it not get too dinged up and help with any heat transfer from my my morning hot beverages to hand....