


renfairpirate
-
Posts
139 -
Joined
-
Last visited
Content Type
Profiles
Forums
Events
Gallery
Posts posted by renfairpirate
-
-
Shipped.
-
I can do paypal Renfairepirate@aol.com
Thanks
-
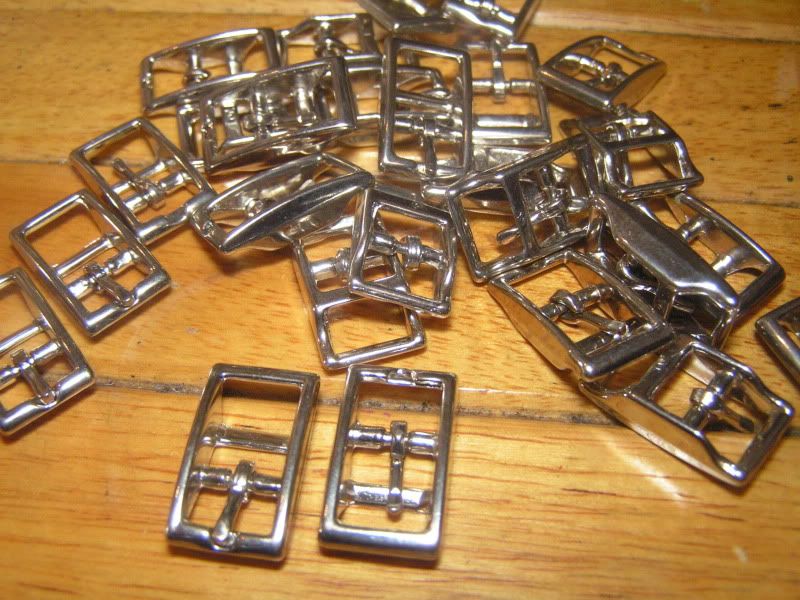
I have 80 of these 1 1/2 inch Buckles don't know why i have 80, I think they are part Rabbit.
But they are for sale $0.75 Each Plus $5.20 Priority Mail Shipping
I Also have 75 Double bar 1 inch by 1/2 inch Buckles. $0.40 Each Plus Priority Mail Shipping
Thanks For Looking
1 1/2 inch
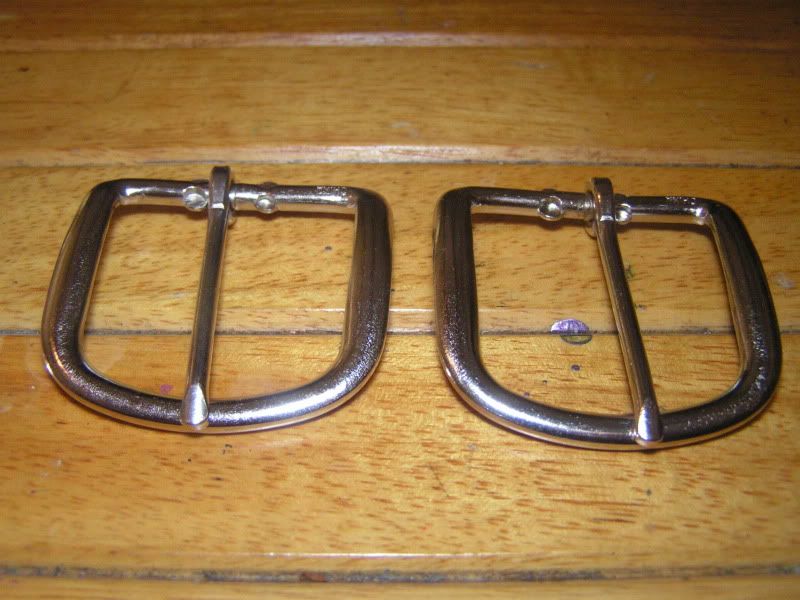
1 inch by 1/2 inch
-
You could also try and a old pool liner and cut it to size
-
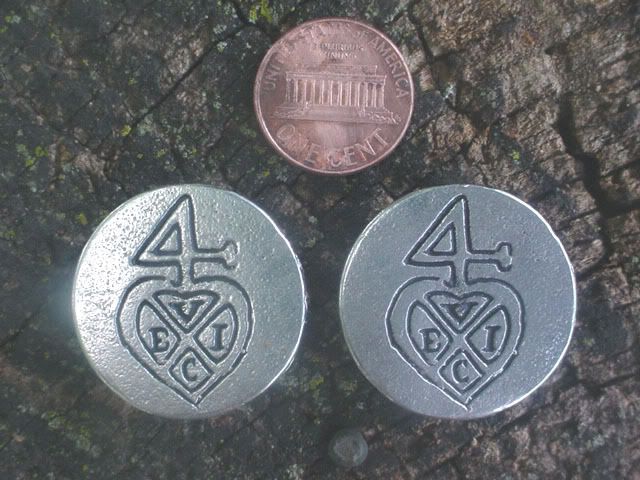
British East India Co.
-
Yes, I was confused, I thought you were talking about adding the powdered graphite to the plaster that makes up the mold, not applying it to the surface of the mold prior to casting. we always just used a candle. Does the powdered graphite evenly stick to the mold surface? I never thought of powdered graphite for casting, always just thought of it as a dry lubricant for locks.
The dry casting lube costs around $12.00 an oz. all it is,
Is fine powdered graphite with a high dollar name.
It just takes a small amount to coat, The plaster will look dirty Gray not black
I only use it if i am doing a button with alot of detail or pouring more than 50 buttons
from the same plaster mold
-
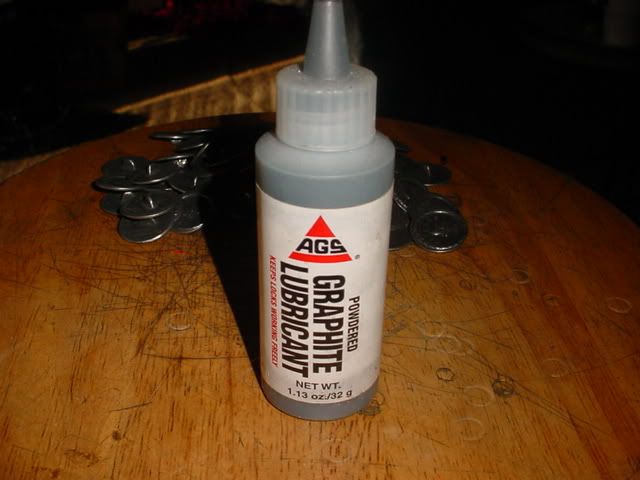
Ok you might want to get a tube of powdered graphite from the hardware store.The stuff you use on door locks.
It cost around $2.00 and dust the mold with it, Sometimes you need it sometimes not.
It will help extened mold life
I will edit my earlier post
-
nice work, but just a quick question, you didn't mention anything in your tutorial about 'smoking the mold'.
when making lead soldiers with a metal mold or when casting bullets, we always 'smoked' the mold, (held the mold over a candle flame and blackened the mold surface).
this procedure would give better metal flow to the different parts of the mold and insure a better product. I am not sure if it would extend the life of a plaster mold or not, so that is why I am askiing.
I use powdered graphite,I thought I included that in the instructions
-
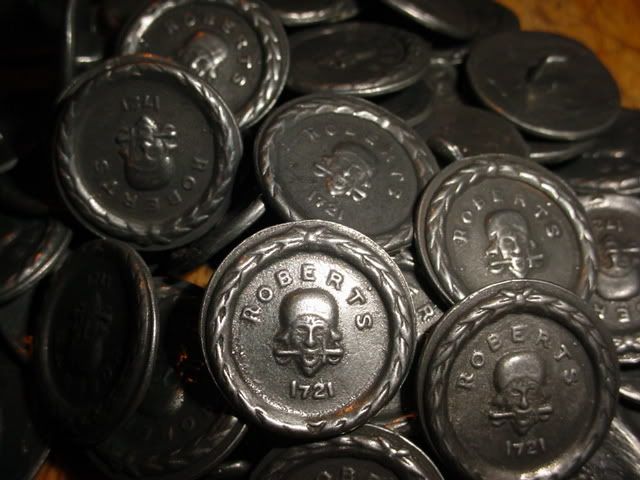
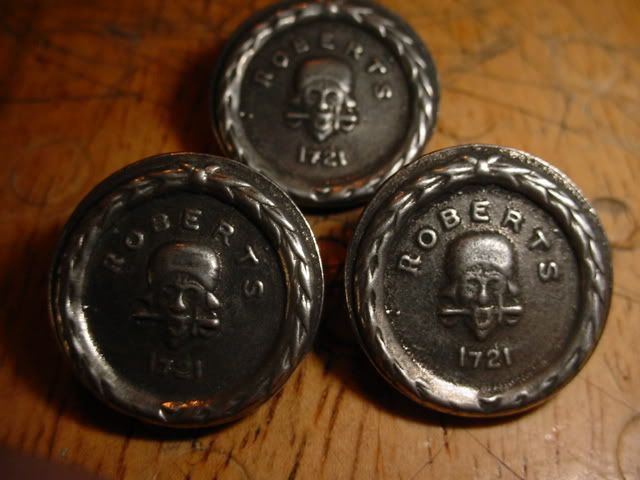
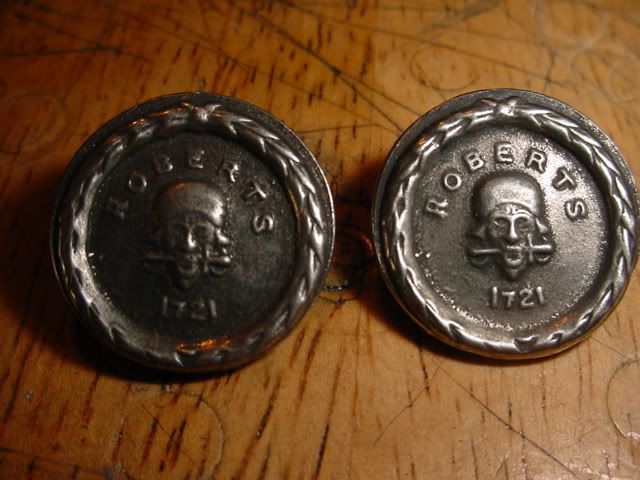
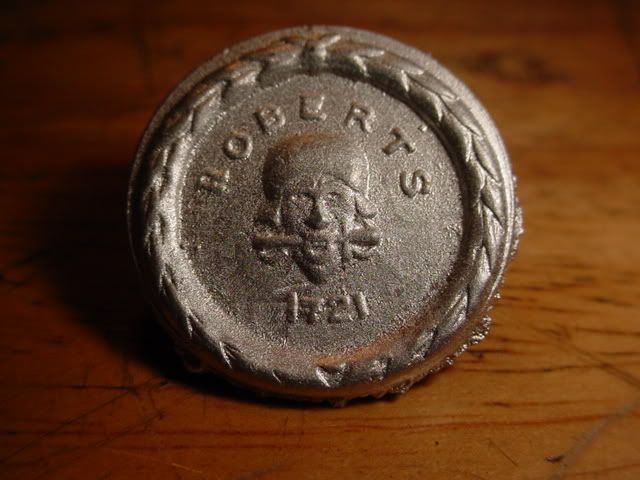
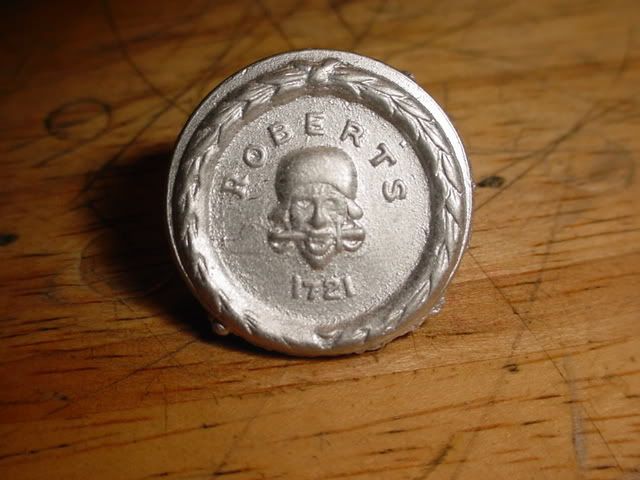
Oh by the way anyone intersted in 100 Dread Pirate Robert Buttons 3/4 inch shank back
$35.00 Shipped.
The copper looking spots are some weird light reflection.
-
Ok here are 1,25 and 50
And 75-100
I could get maybe another 50 or so out of this mold
I hope this helps anyone who is going to try to make there own
-
And 75 & 100
I am cleaning and polishing them now,Will post pics of finished buttons later today
-
Looks pretty good. Do you have a favorite brand of plaster?
I use Hobby Lobby casting and mold making plaster $4.99 for 8 pounds
here is number 25
50
-
That is awesome stuff RenFairPirate! Thanks for sharing!
One question I have about this, how many castings does one tent to get out of a mold before the plaster degrades and the detail starts to get washed out?
Good question. lets try a new mold and pour 100 buttons and check every 25.
Here is button 1. It is uncleaned right out of the mold
-
Haven't tried it yet, but it sure looks neat! I have tried plumbing solder to cast metal toy soldiers; it works like a charm. Best wishes on your surgery, I hope you will soon be recovered and casting buttons by the thousands!

It gets a little better each day
I started casting again but it is slow going for now.
Still needs more clean up but I got a whole 14 poured
-
Hello Everyone, Thanks for the well wishes, Surgery went well They bypassed 5 arteries.
Had an infection set up house in one of my leg incisions. They were talk about amputation
But just found out last week that i get to keep my leg for now.
So I just wanted to see if anyone has tried this yet
-
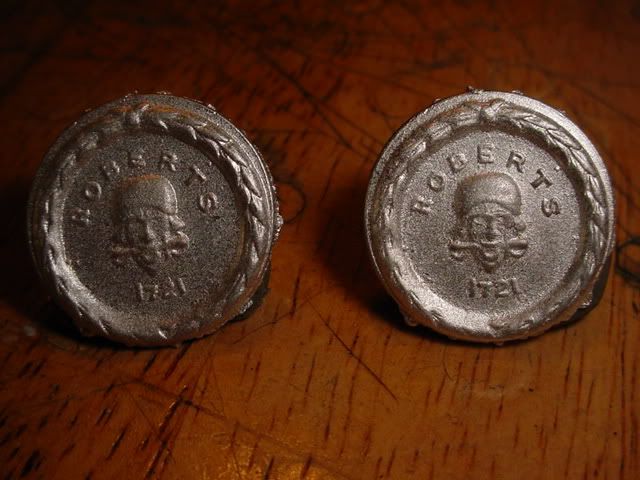
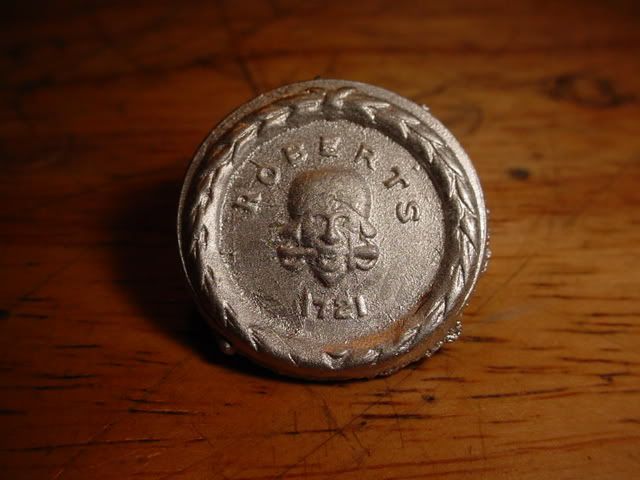
I Still have these for sale if anyone is interested
-
have you ever tried to make the casting mold out of sculpey? fimo?
will baked sculpey take the heat of the molten flux?
Sculpey will burn when you pour molten pewter in it,been there tried that
The extra firm stuff worked a little better but still only good for two or three pours
I got started making buttons because i was making leather pouches and the button selection at walmart sucks. So i started trying everything i could think of to make a cheap mold.RTV rubber is
not cheap average mold cost is $35-40 at the time i could not justify the cost to myself
I found out that you use investment plaster to cast silver and gold so I thought why not try some craft plaster just to see what will happen.I just got started using rubber last year but still use plaster if i just need a small run of a new button as the plaster mold only cost around 50 cents
-
Cool thank you, we've been looking for a way to do this for awhile, this seems like the best for us. we're not a bright crew but we're ambitious
Have you thought about gold leafing them
-
I just started looking in plating pewter if i find a cheap way of doing it I"ll post It
-
I can get about 60 or 70 buttons out of these molds as is, but there are some tricks you can use to get more.
powdered graphite helps extends mold life, I have some of these molds that have over 300 buttons poured, I have one mold that i still pour after 2 years maybe 1200 buttons.
-
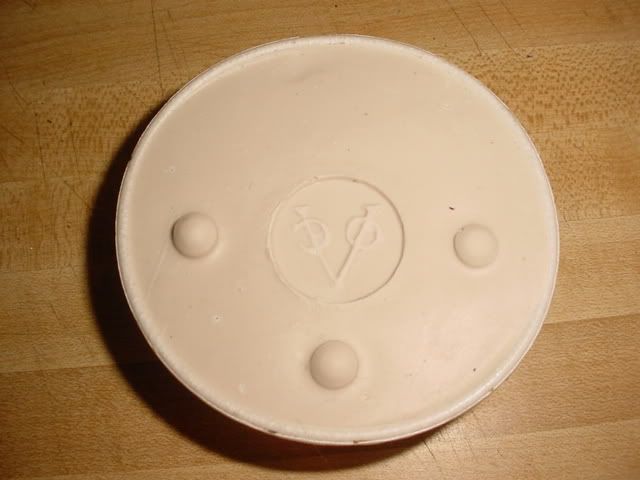
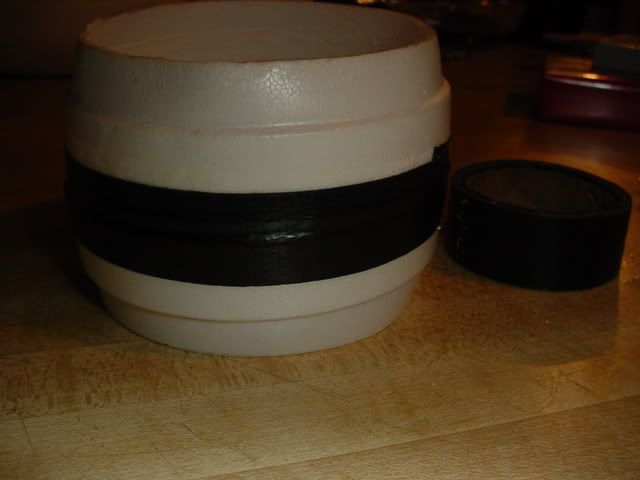
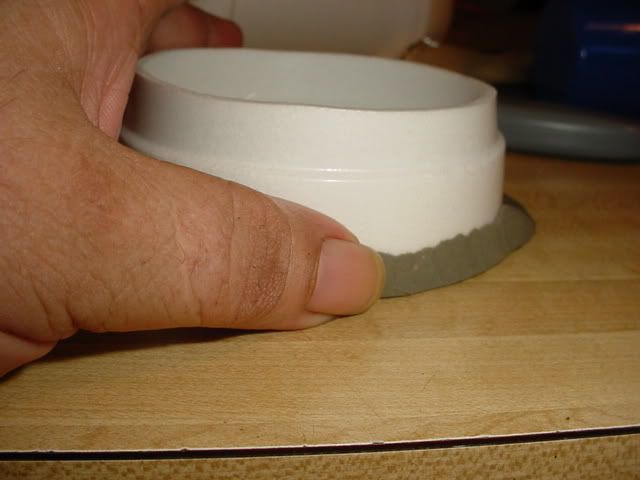
Now remove tape and separate mold you might have to pull hard.
Remove clay

Next place mold in 350 degree oven for 2-3 hours
when dry cut vents and pour sprue
I use a melting pot now but i started with a old tuna can and melted pewter on the stove top
You can get pewter by the pound on-line but with shipping it is like $25.00
if you can get a few people together and do a group buy on a 5 pound bar you can get the price
down to around 12-14 bucks a pound
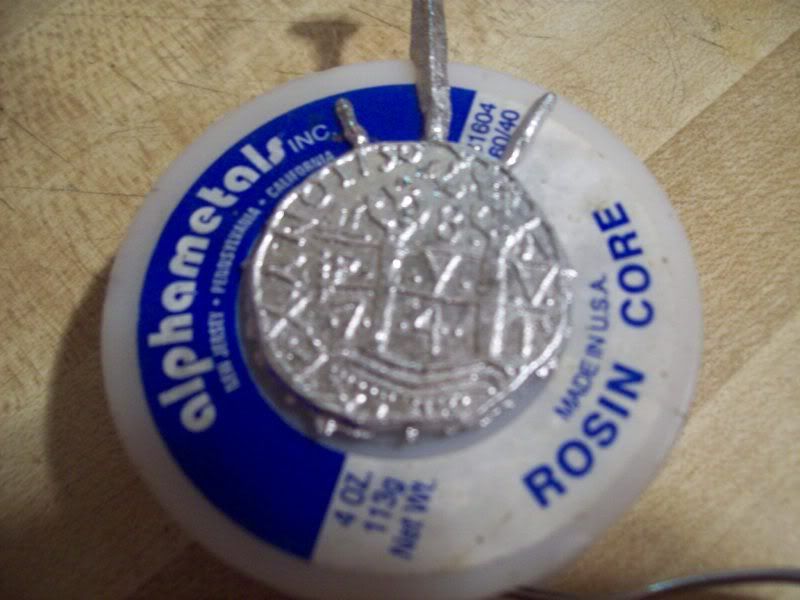
Here is the first button out of the mold in pewter
I tumble my buttons with steel shot but you can buff them on a old pair of jeans and they will shine up
Someone said try lead free solder I will try it later on tonight and post the results
Ok here is one poured with 60/40 it came out fine but it is a little soft i have some hard lead free around here somewhere for making screw back coins i just need to find it
If you have any questions fell free to ask
-
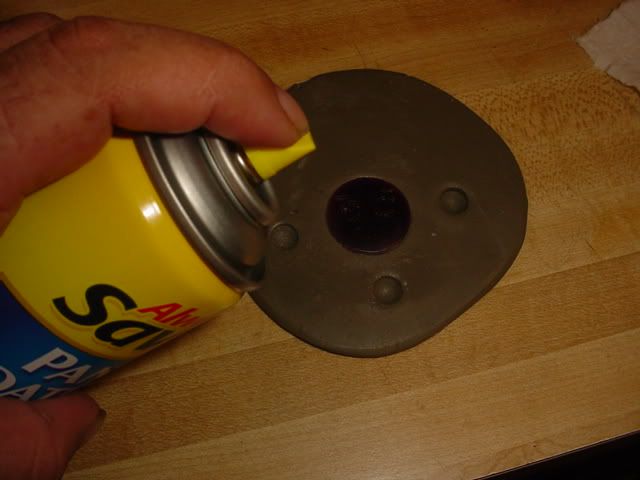
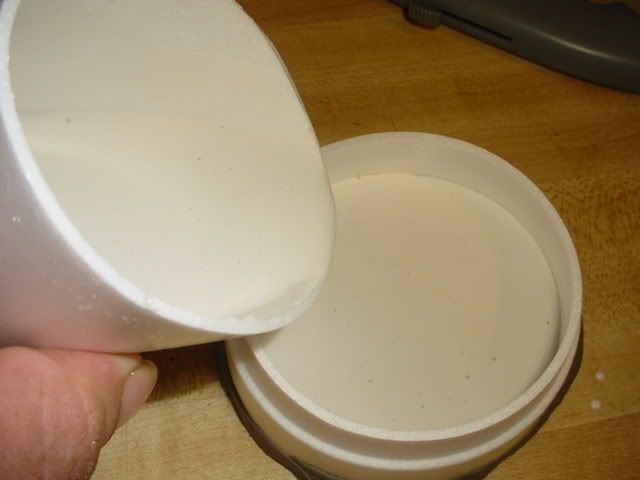
Step 2
When plaster is set remove from clay and remove pattern
Now if you are working with a thick piece or unfinished back take a small peice of clay and
roll it out to the thickness you want the finished button
Place clay in the mold and form the shank
Spray the face of the mold with a heavy coat of pan spray if you forget this step you will not get the mold apart later
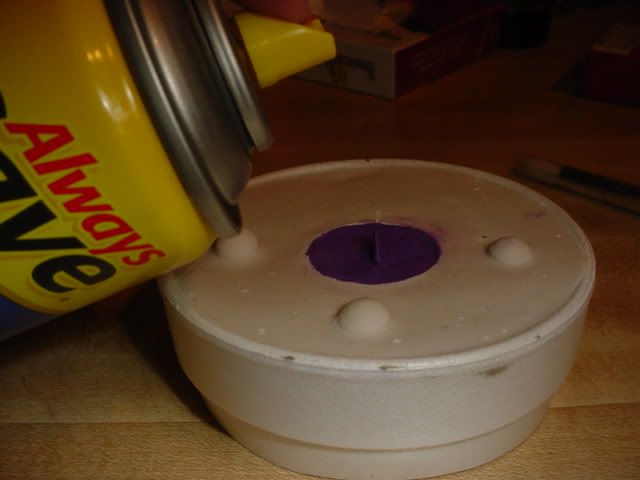
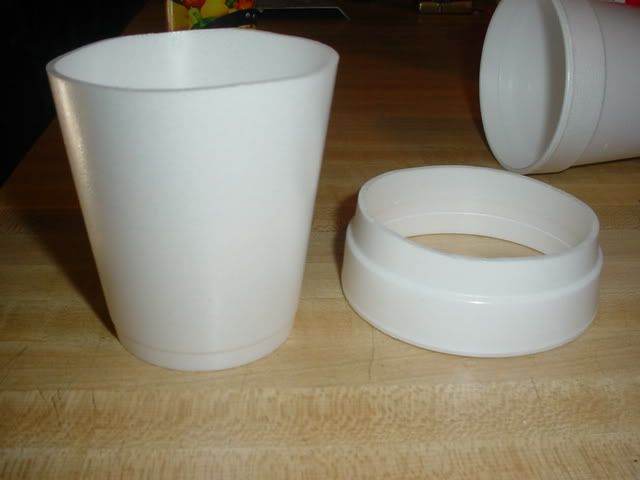
Cut the top off the other cup and tape the two togather and fill with plaster
let set 45-50 min
-
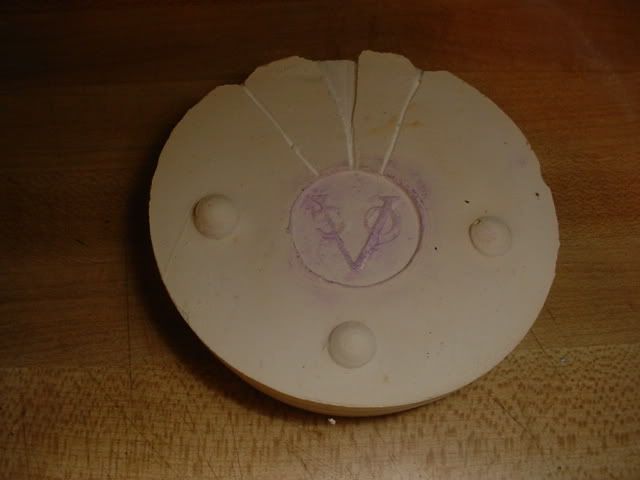
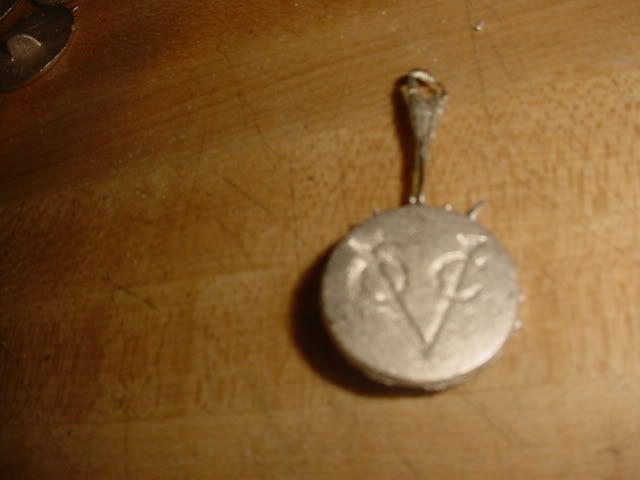
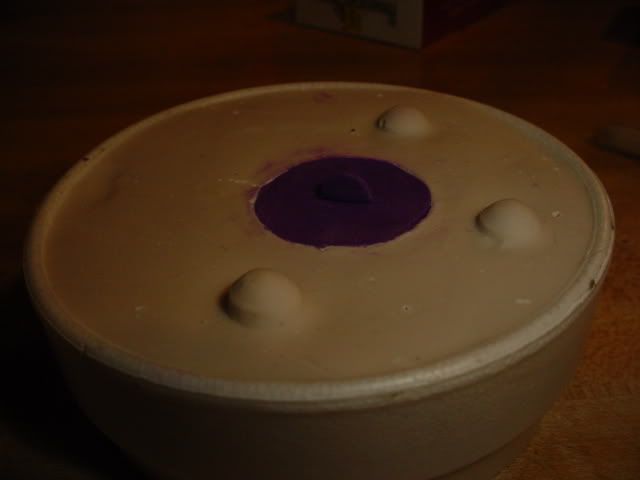
Lets make a Dutch East India Company Button
Step 1
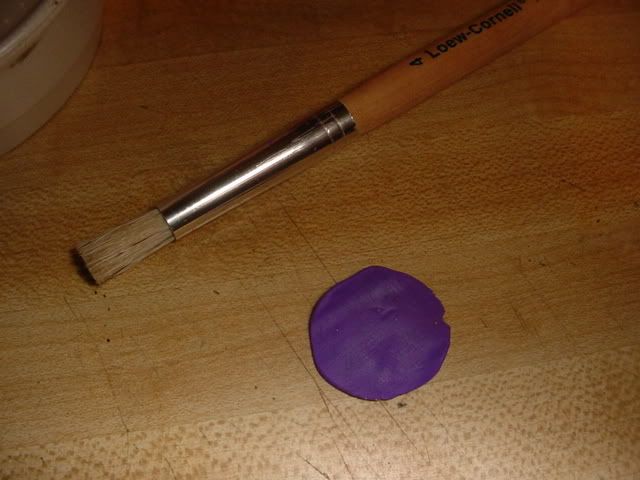
Roll out your clay slightly larger than the top of your cup and center you pattern
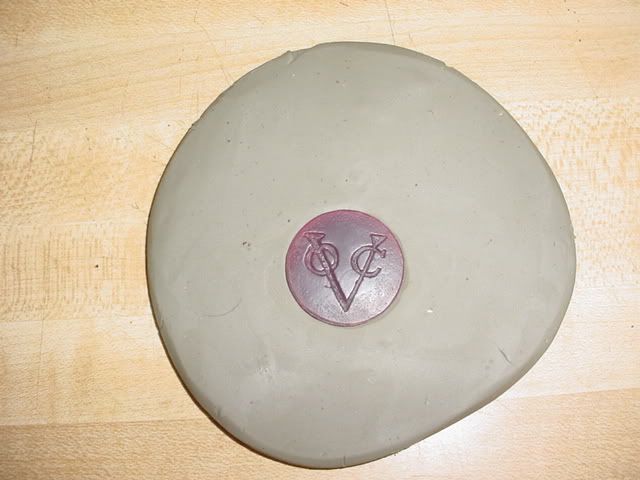
Then make alignment keys I use the back of the craft brush
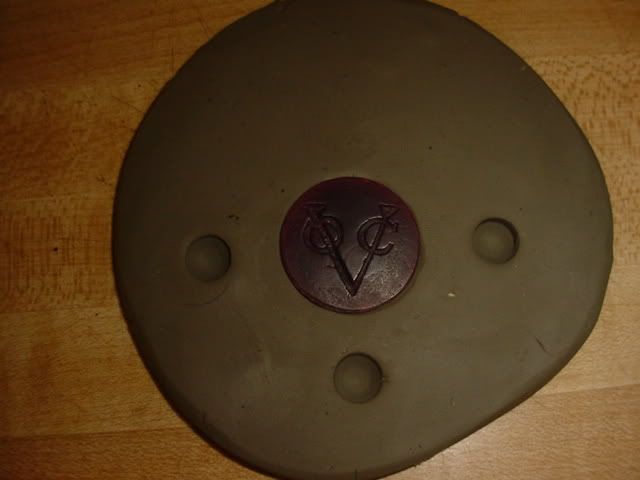
Spray a light coat of pan spray on the pattern, Wipe off excess
Cut top off cup
Place frame around pattern and seal edge
Mix enough plaster to fill first half of mold
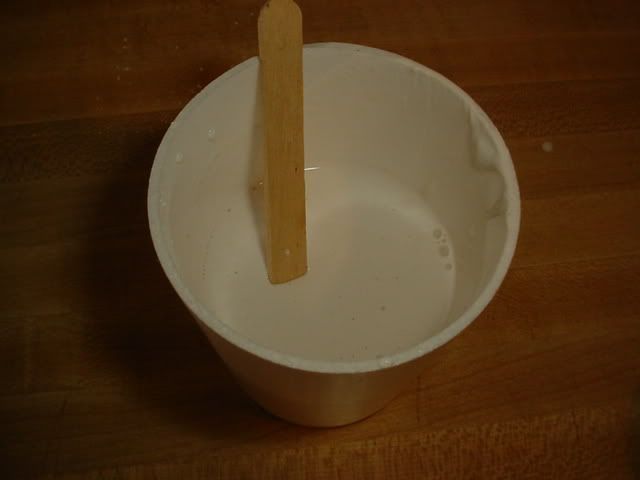
Fill mold and let set till plaster is set about 45-50 min
-
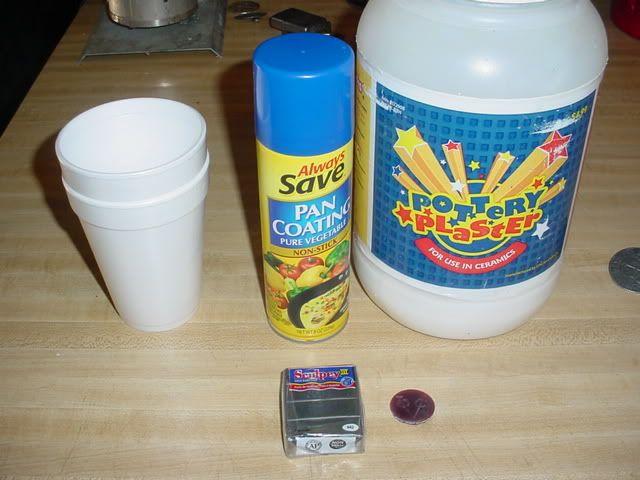
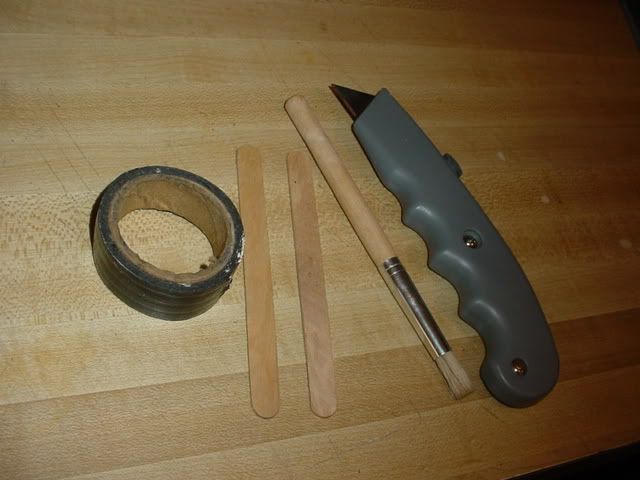
I have had a few members ask about making a Inexpensive temporary button mold and since I have some time before surgery I am posting a tutorial
So here we go
You will need some craft plaster,You can get it at walmart or hobby lobby for under $5.00
DO NOT use plaster from the hardware store it will flake and crack at over 400 degrees
Molding clay, any kind will work $2.00
A mold frame,I use Styrofoam cups $1.00
masking tape or duct tape $2.00
A small paint or craft brush $2.00
A can of pan spray NOT THE BUTTER FLAVOR KIND $2.00
A tube of powdered graphite to dust mold after baking
I carve my masters from Jewelers wax, But you can make it from just about anything or use a button you already have as long as there are no undercuts in the design
This will take about 4 to 5 hours from start to first button
Breast cancer pins
in Thieves Market
Posted
I still have some but will need to look for them